The General Ledger Export report allows you to define your own chart of accounts using a spreadsheet, and then to map those accounts to your payroll data in Eddy. You can then download a file you can import into tools like QuickBooks, Sage Intacct, or any other accounting system.
Before You Begin
Make sure you know which accounting system you’re exporting to (for example, QuickBooks Desktop or Sage Intacct). Have access to your accounting system’s chart of accounts, and also have permission in Eddy to view payroll reports and manage report settings.
Step 1: Open the General Ledger Export
-
Go to the Payroll Reports area in Eddy.
-
Select General Ledger Export from the list of reports.
-
If this is your first time, you’ll see a setup blank state with instructions and settings.
You must complete the setup steps before Eddy can generate your report.
Step 2: Download the Chart of Accounts Template
-
In the setup area, click the primary button to Download template.
-
Save the file to your computer.
-
After the first download, the primary button will change to a link for future downloads.
This template shows the exact format Eddy expects when you upload your chart of accounts.
Step 3: Prepare Your Chart of Accounts File
-
Open the downloaded template in your spreadsheet tool (Excel, Google Sheets, etc.).
-
Copy or enter your chart of accounts information into the template.
-
Make sure you keep:
-
All required columns.
-
The same column order and headers.
-
-
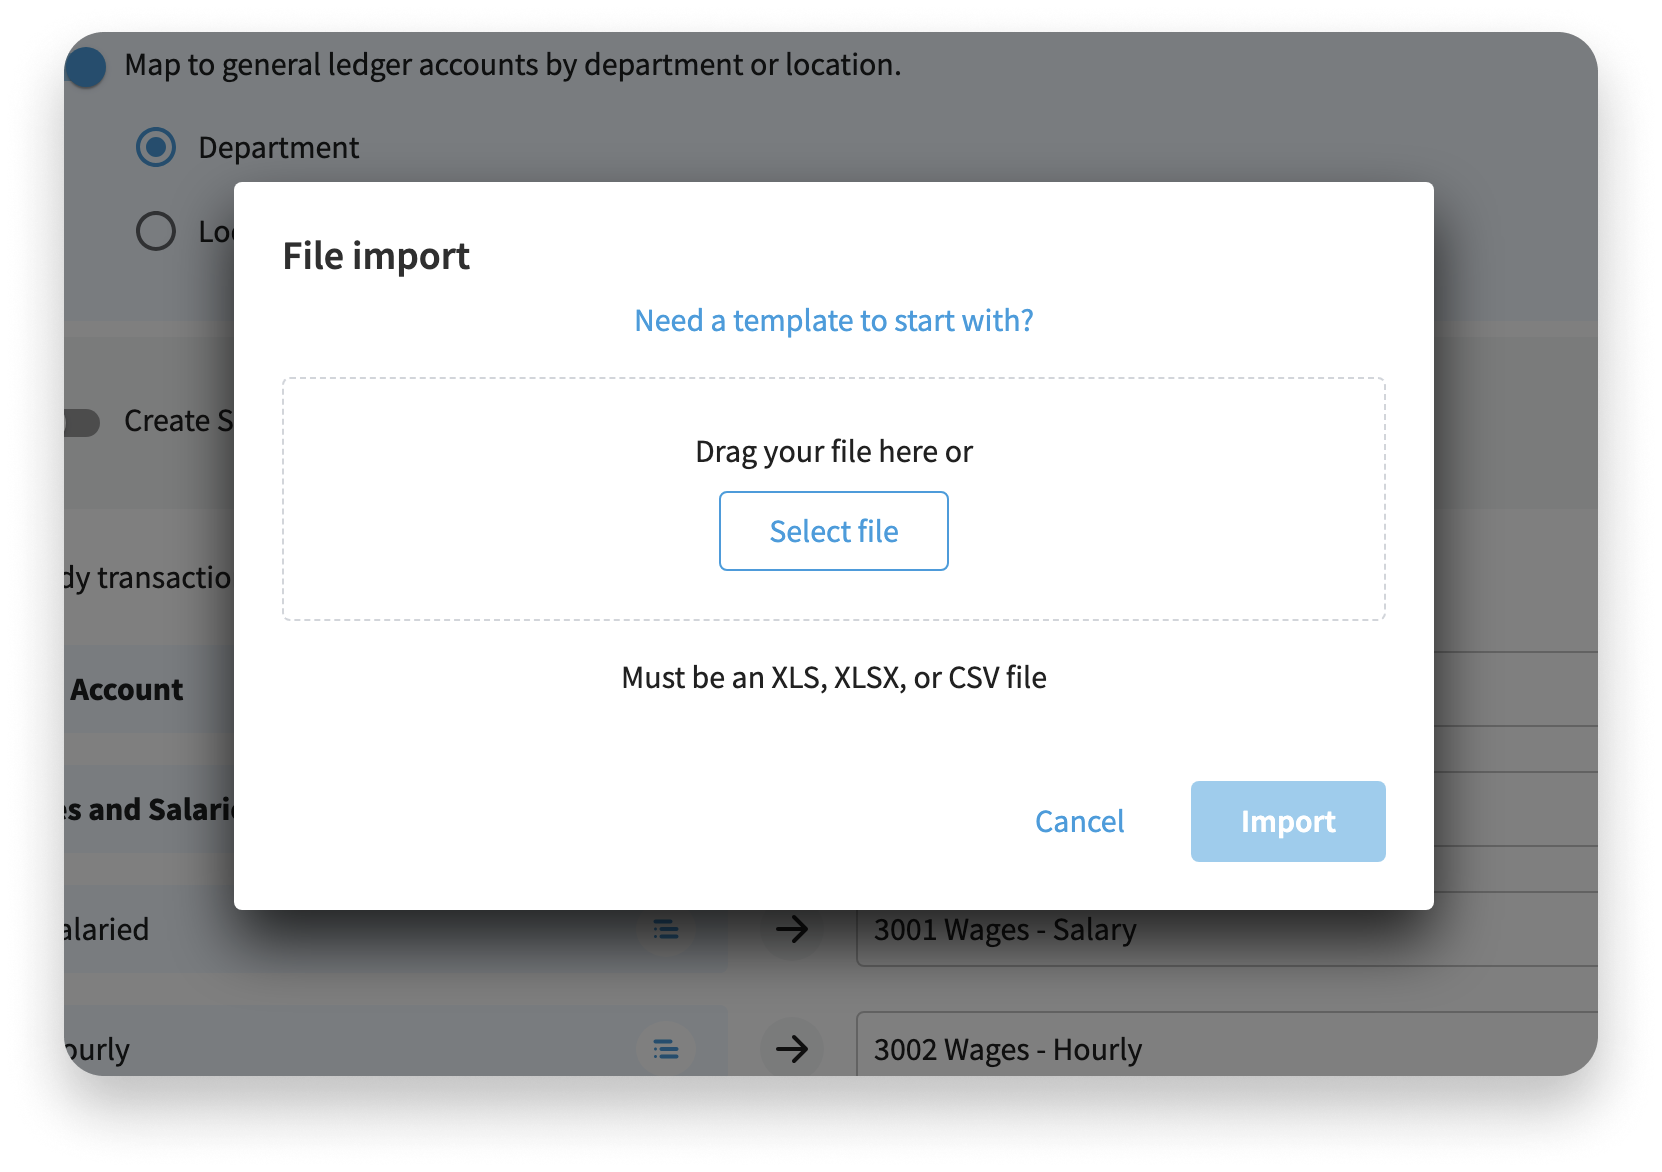
Save the file in a supported format (Must be an XLS, XLSX, or CSV file).
Step 4: Upload Your Chart of Accounts
-
Return to the General Ledger Export setup page.
-
In the Upload chart of accounts area, click to select a file and choose the template you just filled out.
-
Wait for the upload to complete.
If the file is valid, the file name appears on the card and the state changes to show the uploaded file. If the file has errors (for example, missing columns or wrong format), an error message appears and you’ll need to fix your file and try again.
To remove or replace a file "replace" button next to the filename to remove it and return to the initial upload state.
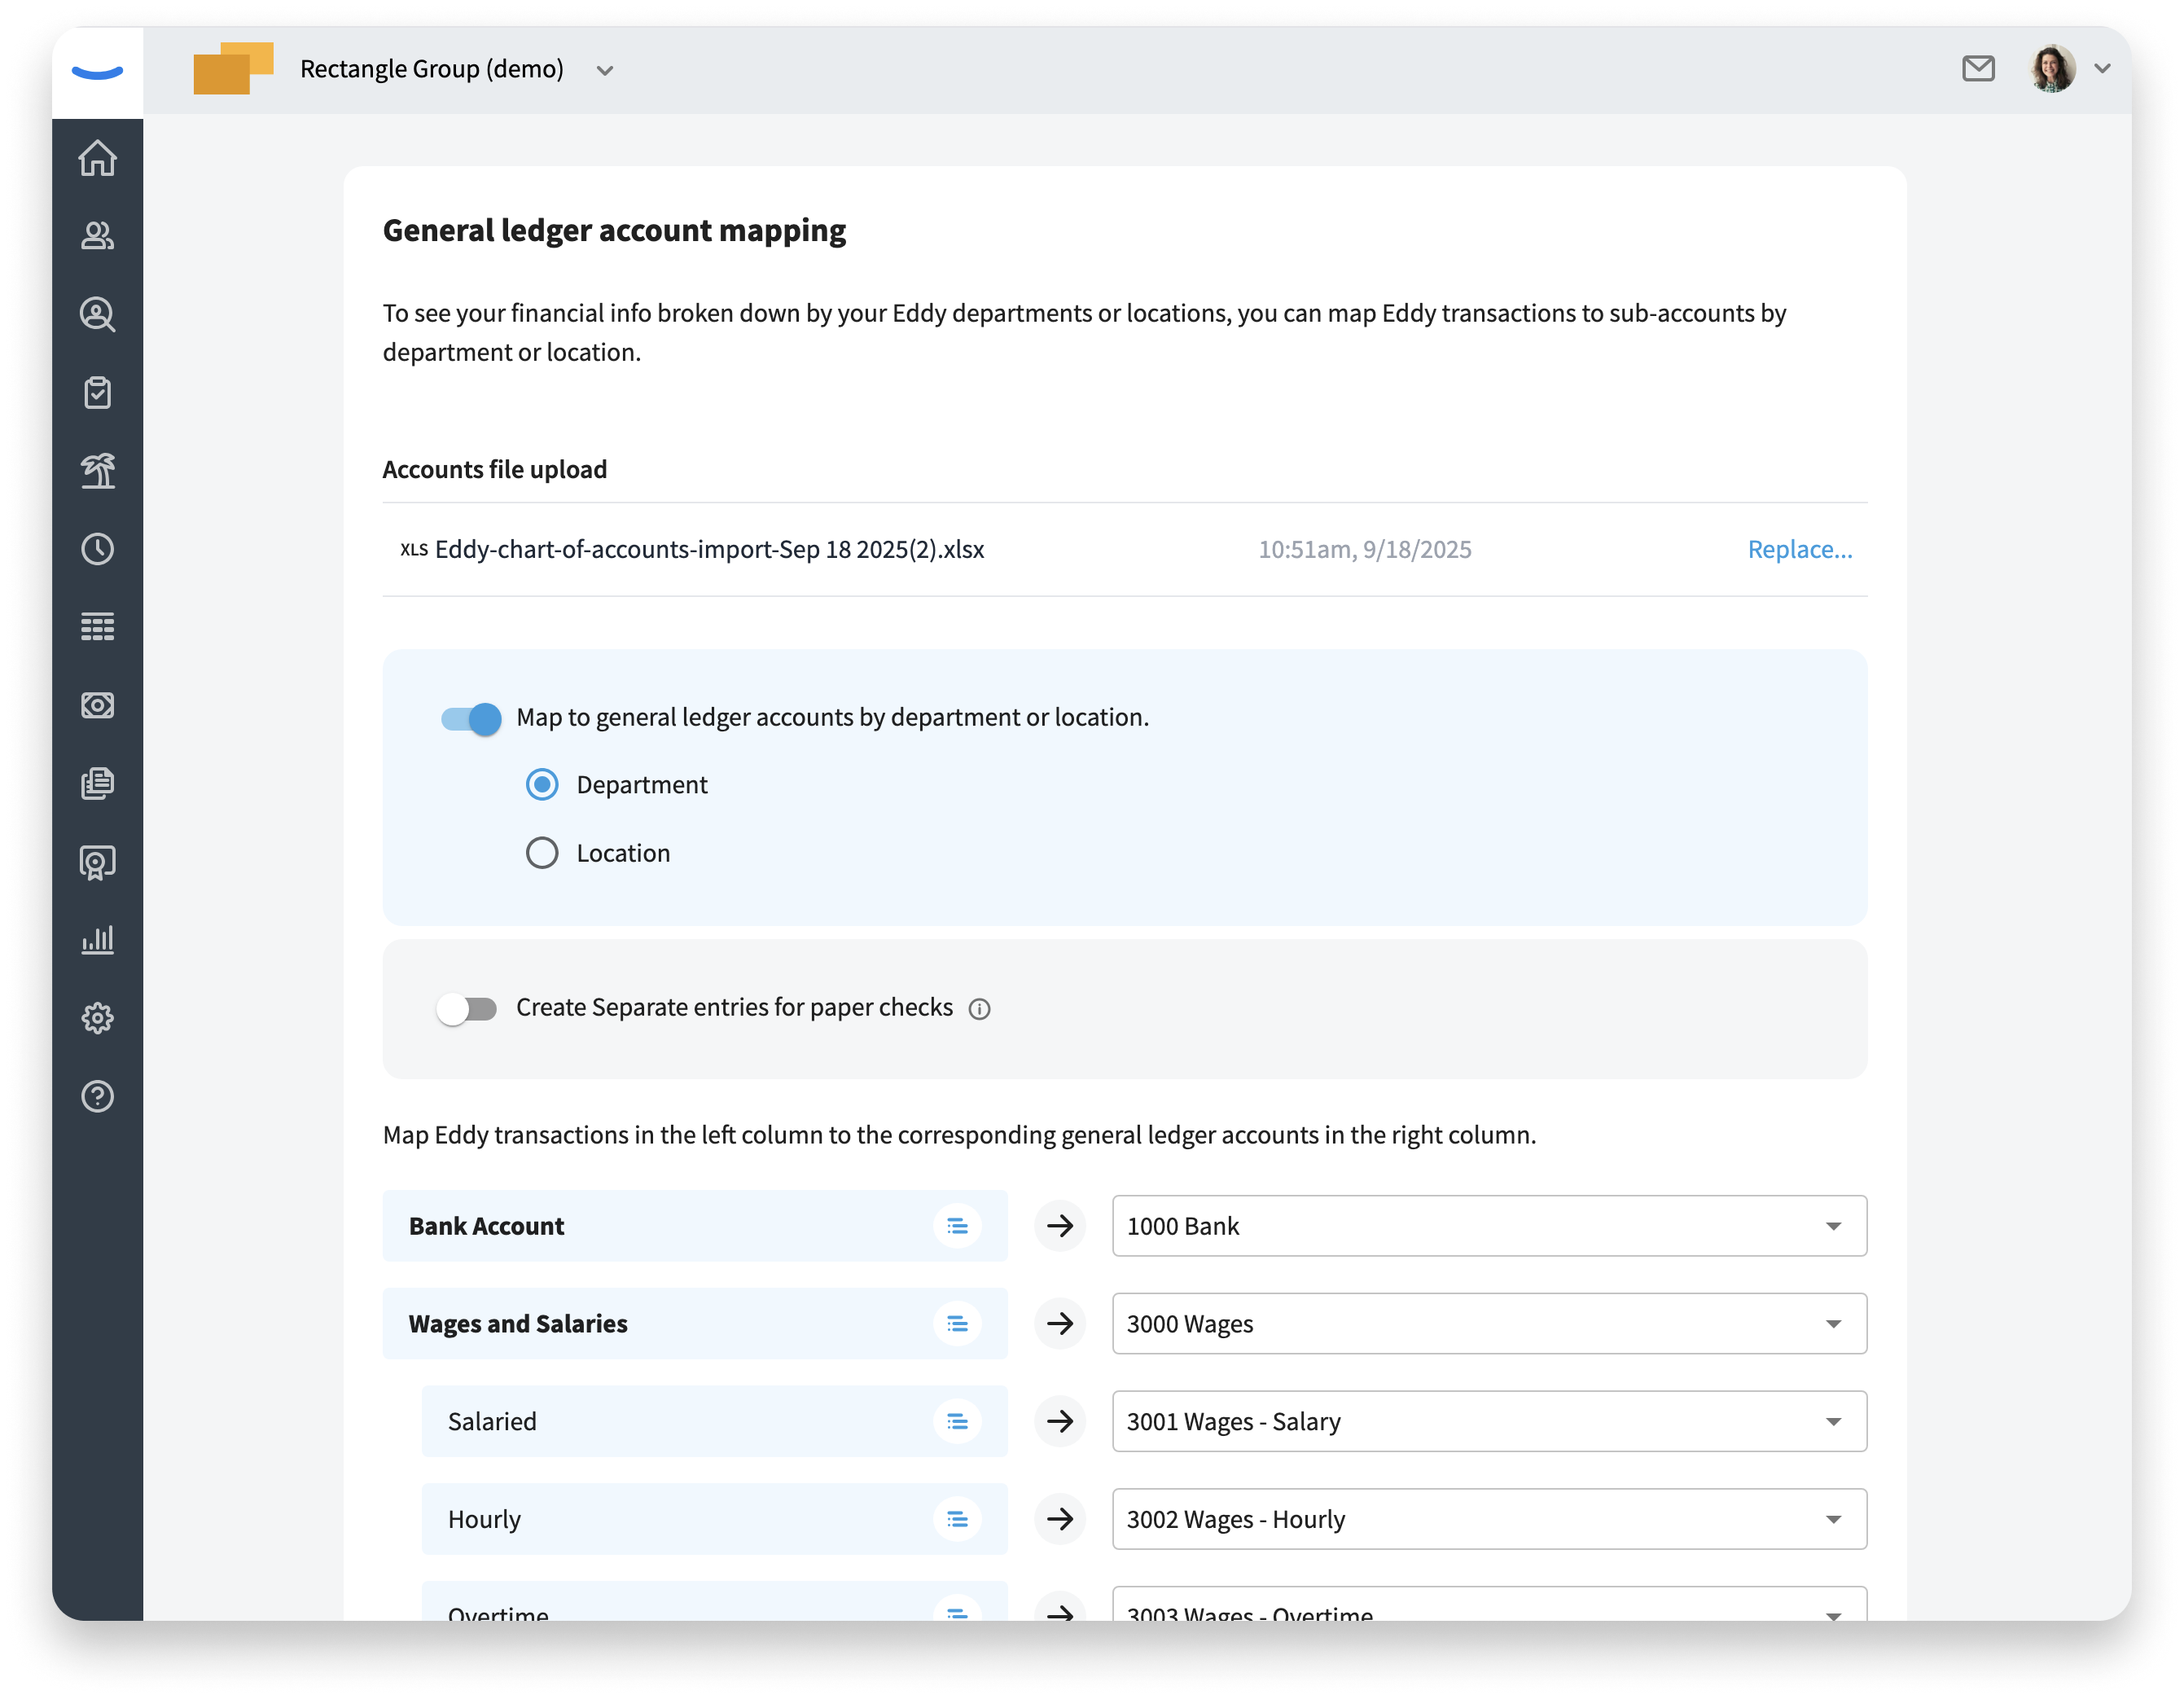
Step 5: Map Your Accounts
Once your file is successfully imported, you can map your chart of accounts to Eddy’s data.
-
Click Map accounts.
-
You’ll be taken to the mapping page, which uses the same interface as other Eddy account mappings.
-
For each row, map your imported account to the correct Eddy account or dimension.
On the mapping page you’ll see the chart of accounts you imported. You can click Replace if you need to import a different chart of accounts file and redo the mapping.
You have two options when you’re done or need a break:
-
Save and Exit: Saves your progress and returns you to the setup page without generating the report yet.
-
Mapping is complete: Saves your mappings and exits setup so you can view the report.
You must click Mapping is complete at least once before the report becomes available.
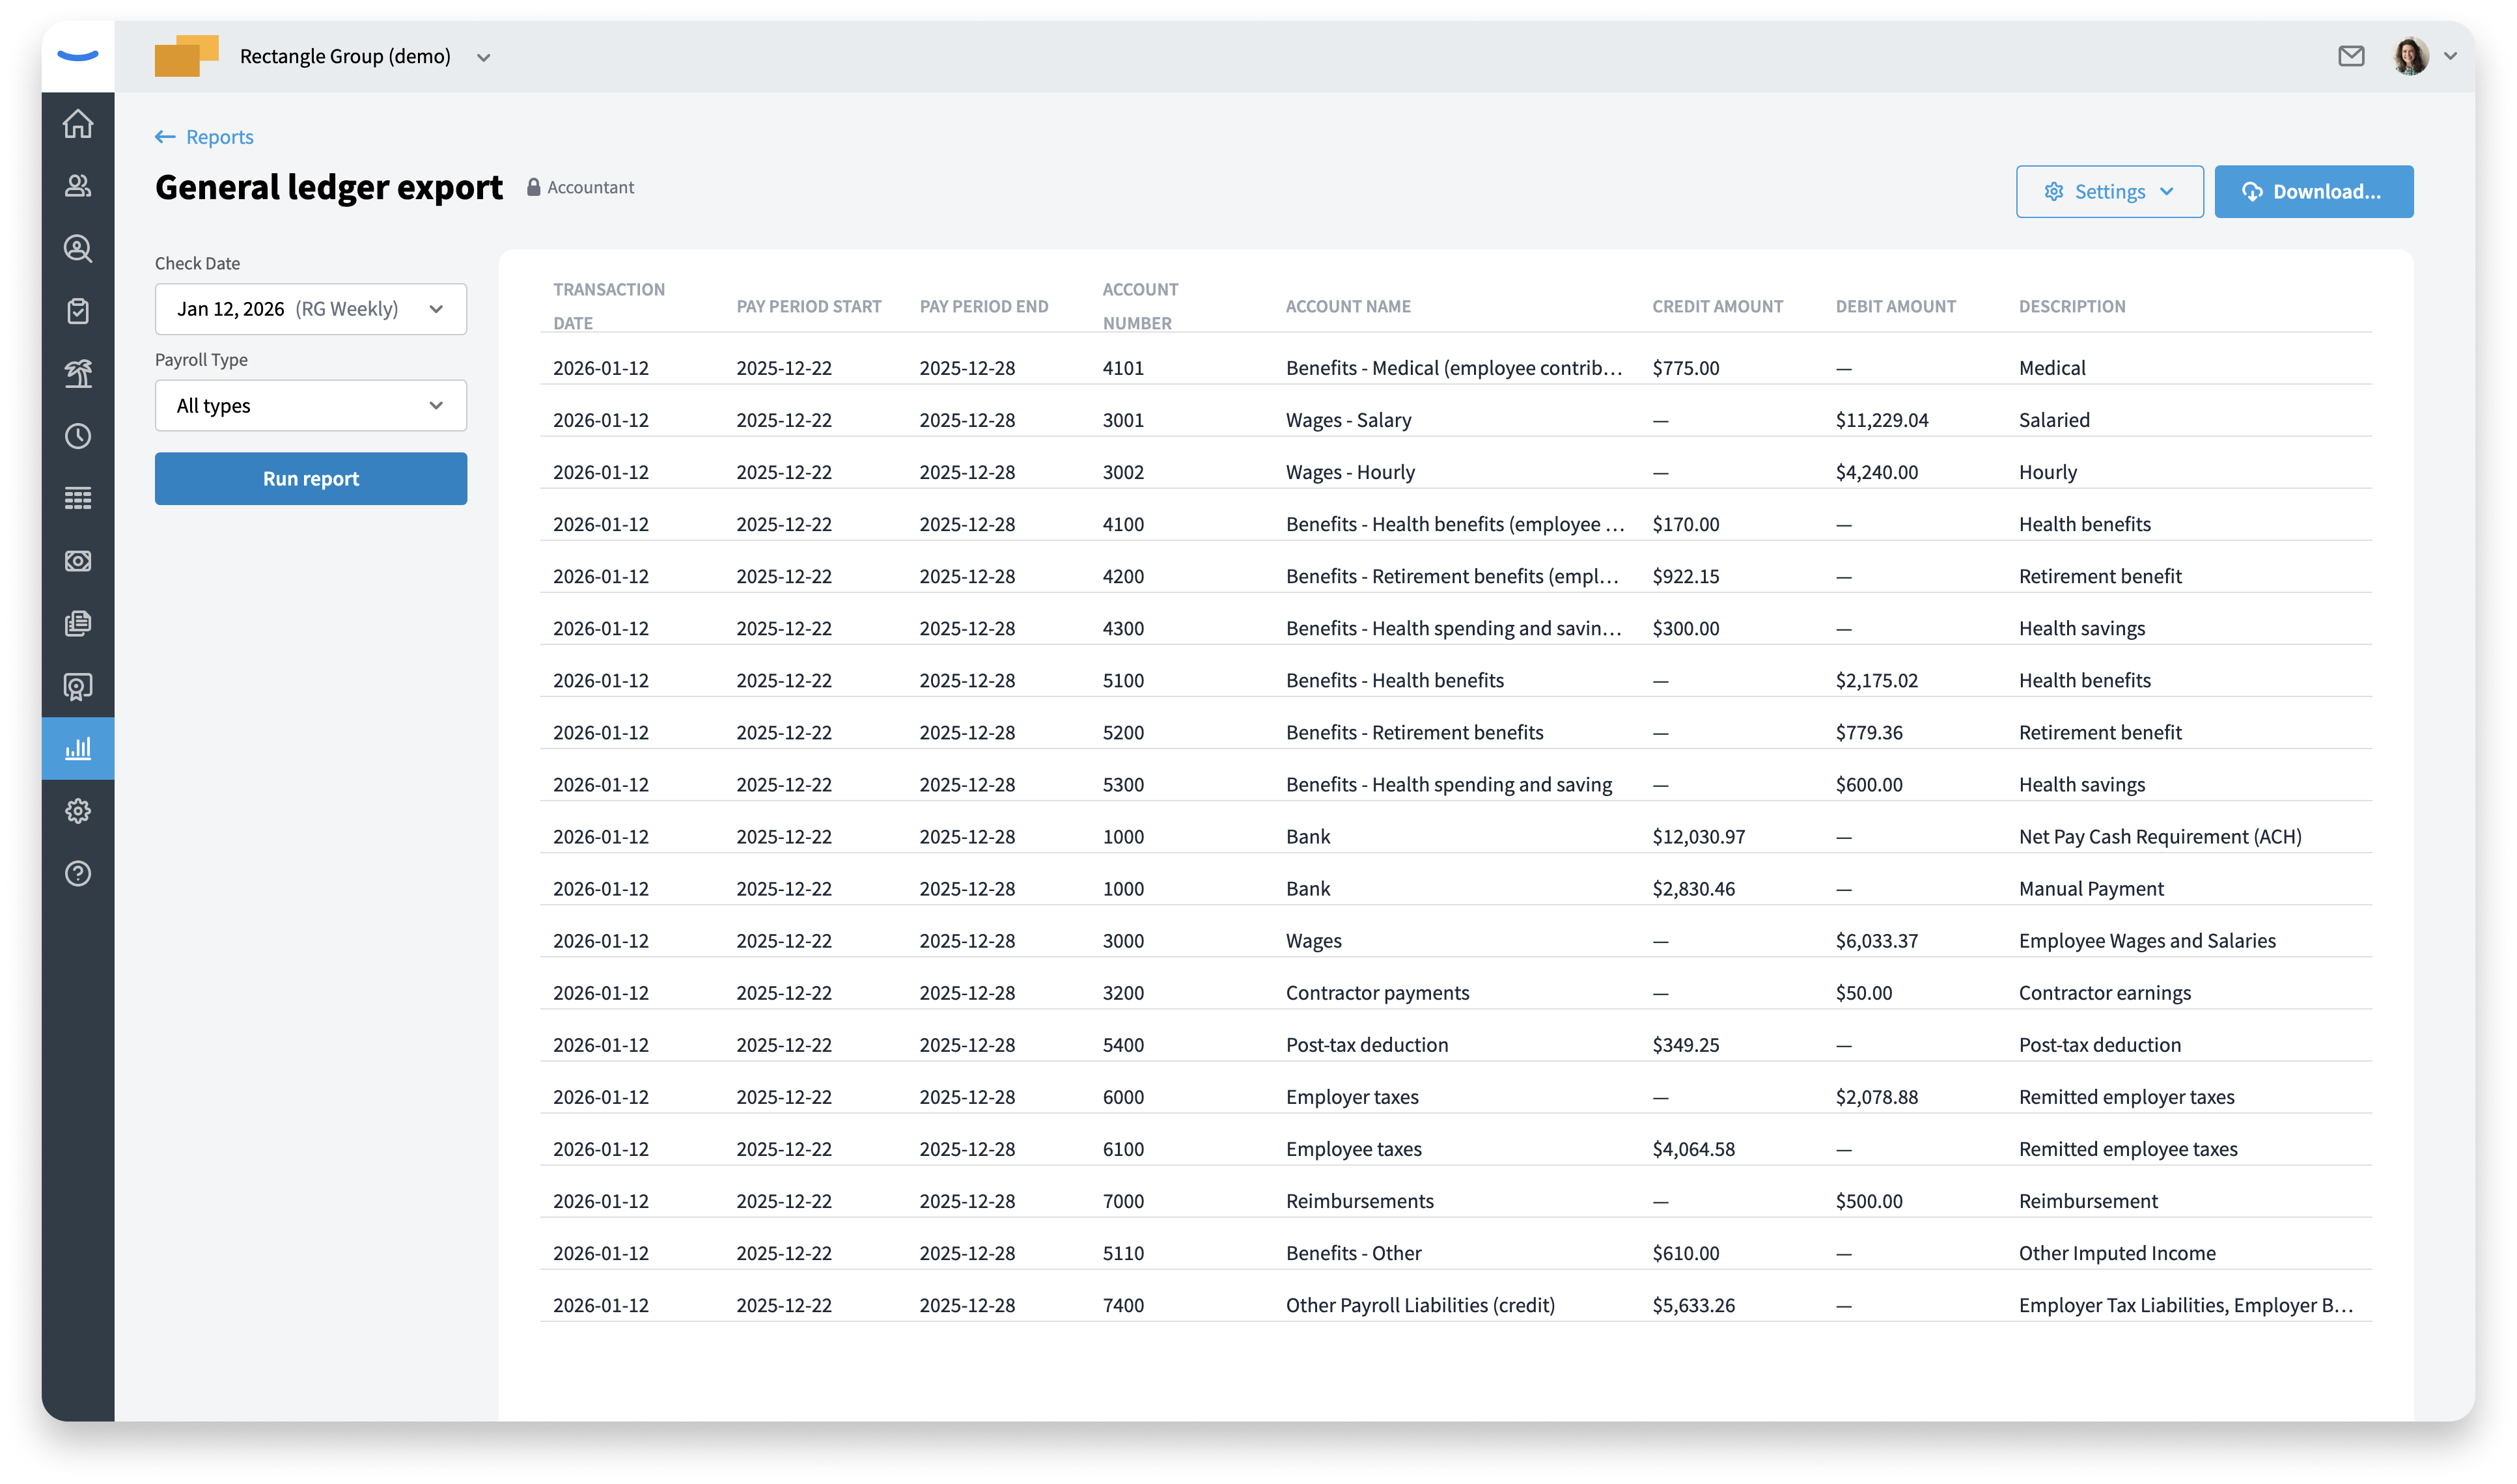
View the General Ledger Report
After you complete mapping:
-
Return to the General Ledger Export report.
-
Select the desired date range or payroll runs (depending on how your report filters are configured).
-
The report will show your general ledger data using your mapped chart of accounts.
You can review the data on-screen to confirm it aligns with what you expect before downloading.
Download the Export File
From the General Ledger Export report, click the Download button. Choose a Download format. Supported formats include: a generic format as well as custom formats for QuickBooks Online and Sage Intacct.
Use Report Settings
In the General Ledger Export report, you’ll see a Settings button.
Clicking Settings opens a dropdown with:
-
Return to mapping: Go back to the account mapping page to review or update your mappings.
-
Open automation: Configure automatic emailing of this report.
Use Return to mapping if you change your chart of accounts or need different mappings for new accounts.
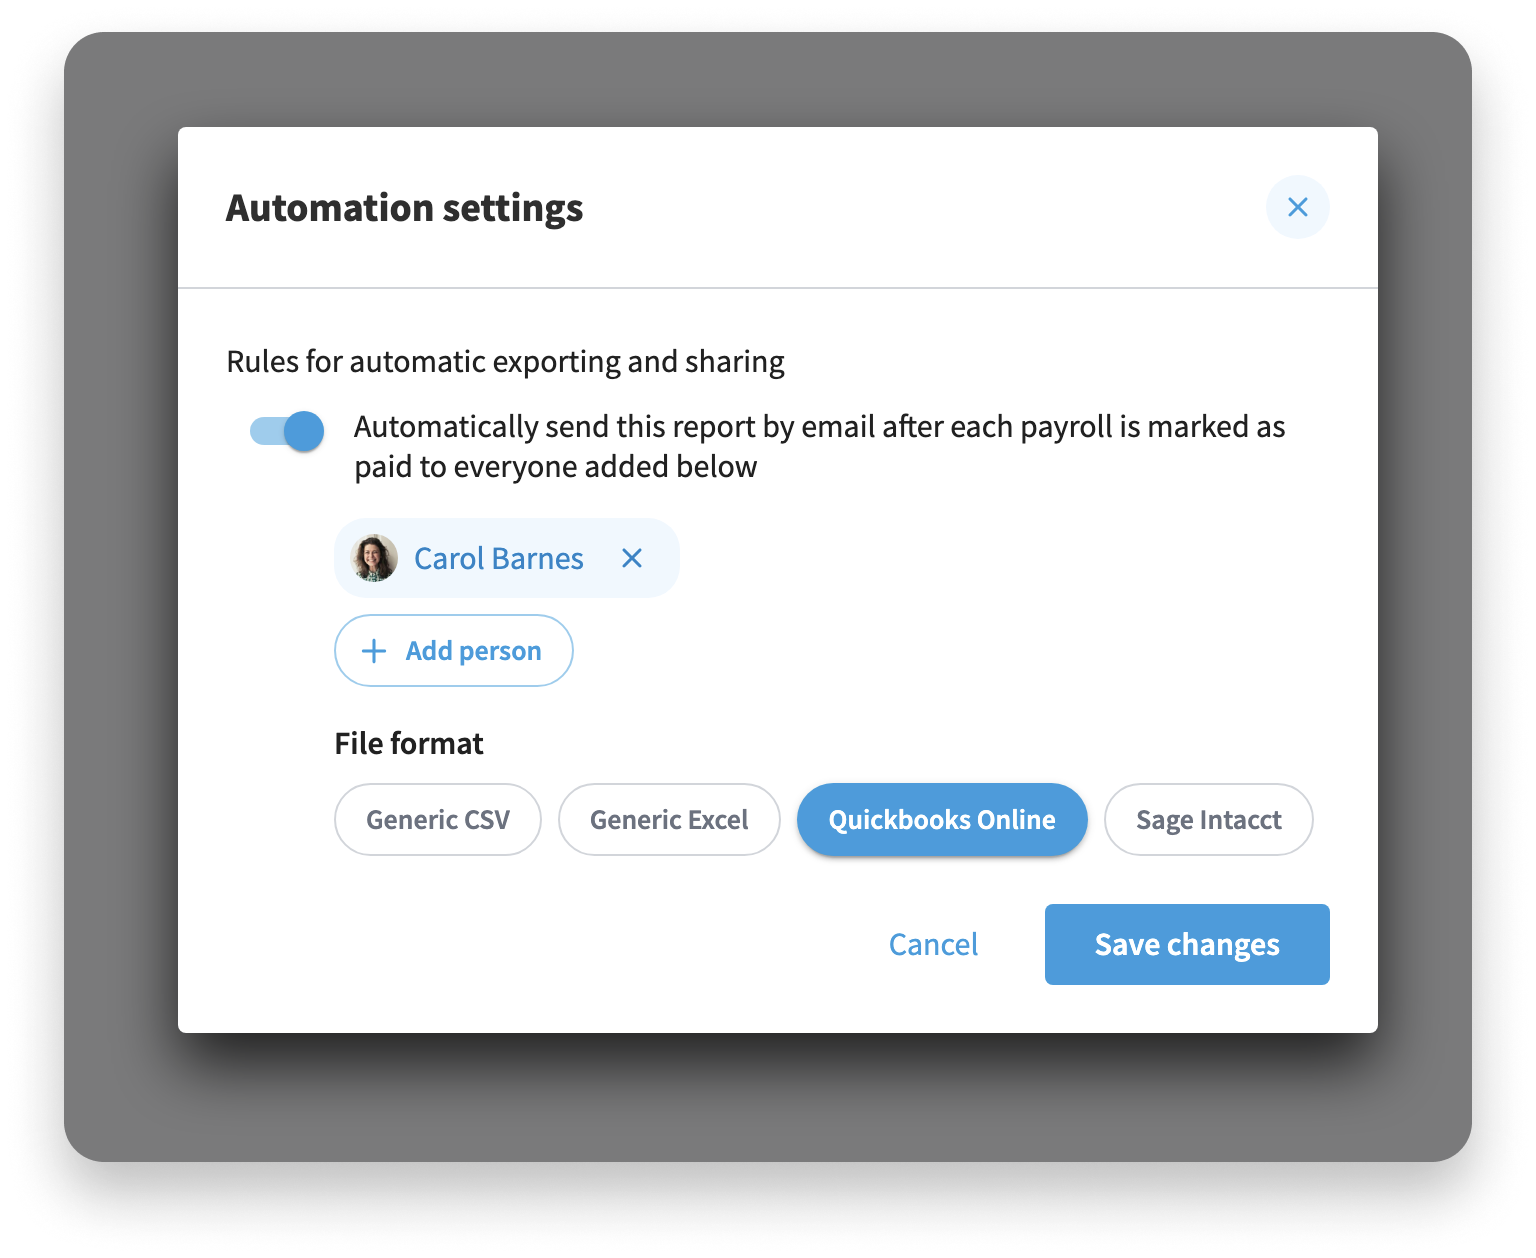
Automate Email Delivery
From Open automation, you can set up recurring email delivery of the General Ledger Export. In the automation dialog, you can turn automation on or off with a toggle, add one or more recipients, and choose which file format is used for the attached report.
Enabling Automation
-
Toggle automation On.
-
Click Add a person.
-
Choose whether to:
-
Select an Eddy user, or
-
Add an email address.
-
The Save changes button will stay disabled until at least one valid recipient is added.
Adding Eddy Users
-
Choose the Eddy user option.
-
Use the search box to find an active Eddy user.
-
Select the user to add them as a recipient.
-
Repeat as needed to add multiple users.
Selected users appear in the list of recipients in the automation card.
Adding External Email Addresses
-
Choose Add an email address.
-
Enter the email address into the input field.
-
If the email is valid, you can save it and it will appear as a recipient.
-
If the email is invalid, an error message will appear and you’ll need to correct it.
You can mix Eddy users and external email addresses in the same automation.
Choosing the File Format for Automation
In the File Format area of the automation dialog you can pick your preferred file format. The selected format is what recipients receive in their email.
Remember to click Save changes to apply your automation settings.
Updating Your Chart of Accounts Over Time
If your chart of accounts changes (for example, you add new accounts or restructure segments):
-
Download the latest template again if needed.
-
Update and re-upload your chart of accounts file.
-
Go back to Map accounts to review and adjust mappings.
-
Click Mapping is complete once you’ve finished.
Any new exports will use your latest imported chart of accounts and mappings.