As a company administrator, it’s important to always have an eye on your employees’ time off balances. Eddy allows you to have a simple, at a glance view of all your employees’ balances in one place. You can also modify this to show display balances for any given date range.
Employee Balance Report Overview
Viewing All Employee Balances
Eddy makes it easy to see all employee Time Off balances at any given time.
On the Time Off tab, HR admins will have the option to see the "Balances" sub-tab. Clicking on this sub-tab will show a list of every employee who has a current balance for any PTO category.
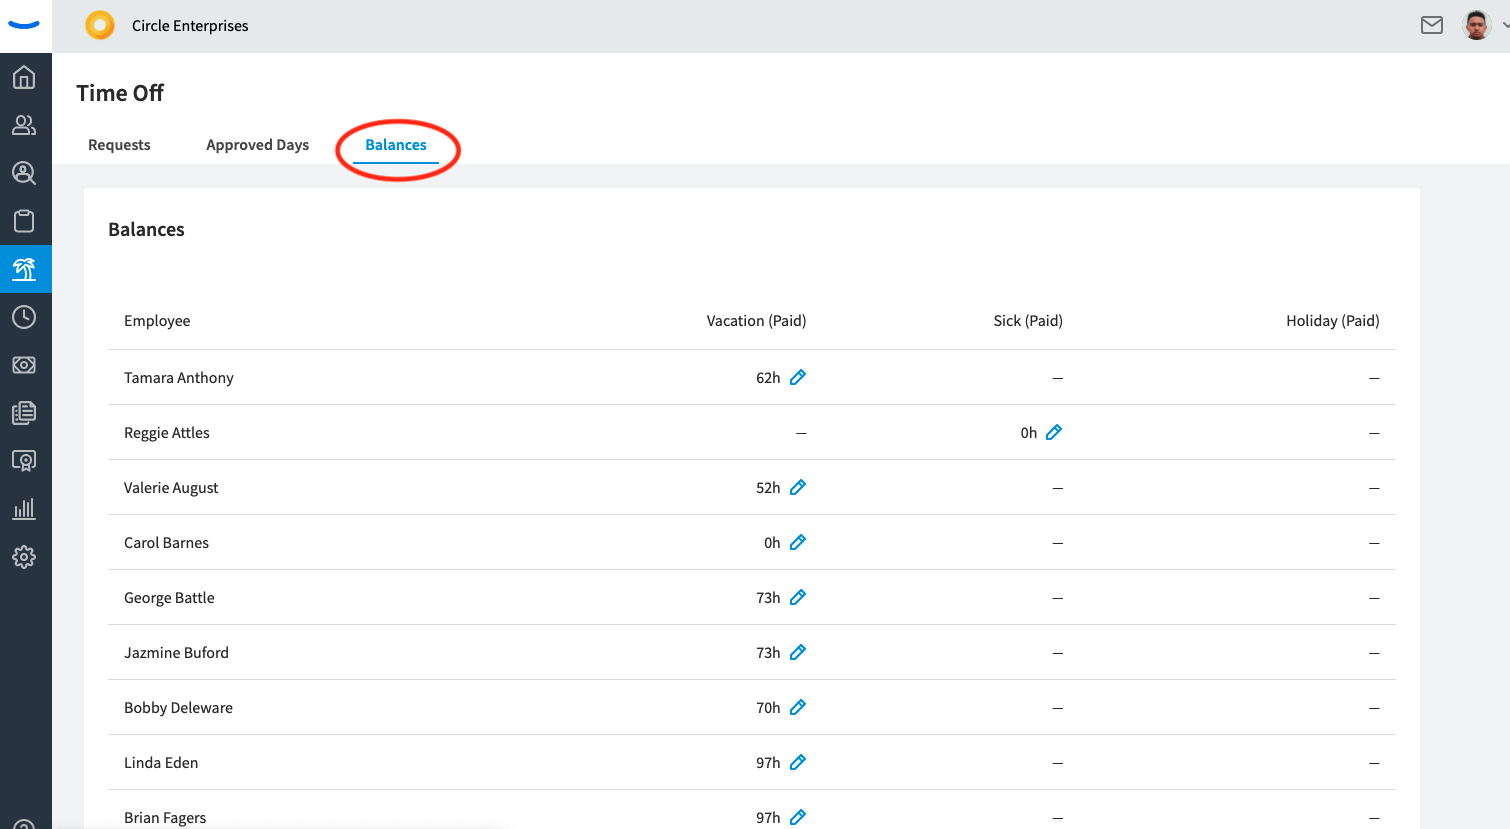
You are also able to edit an employee's balance from this screen by clicking on the "edit" pencil beside the balance for each category.
Viewing the Balance Report
For a more in depth look of employee balances and to understand how they've changed over time, you can navigate to the "Time Off Balances" report found in the Reports section of Eddy.
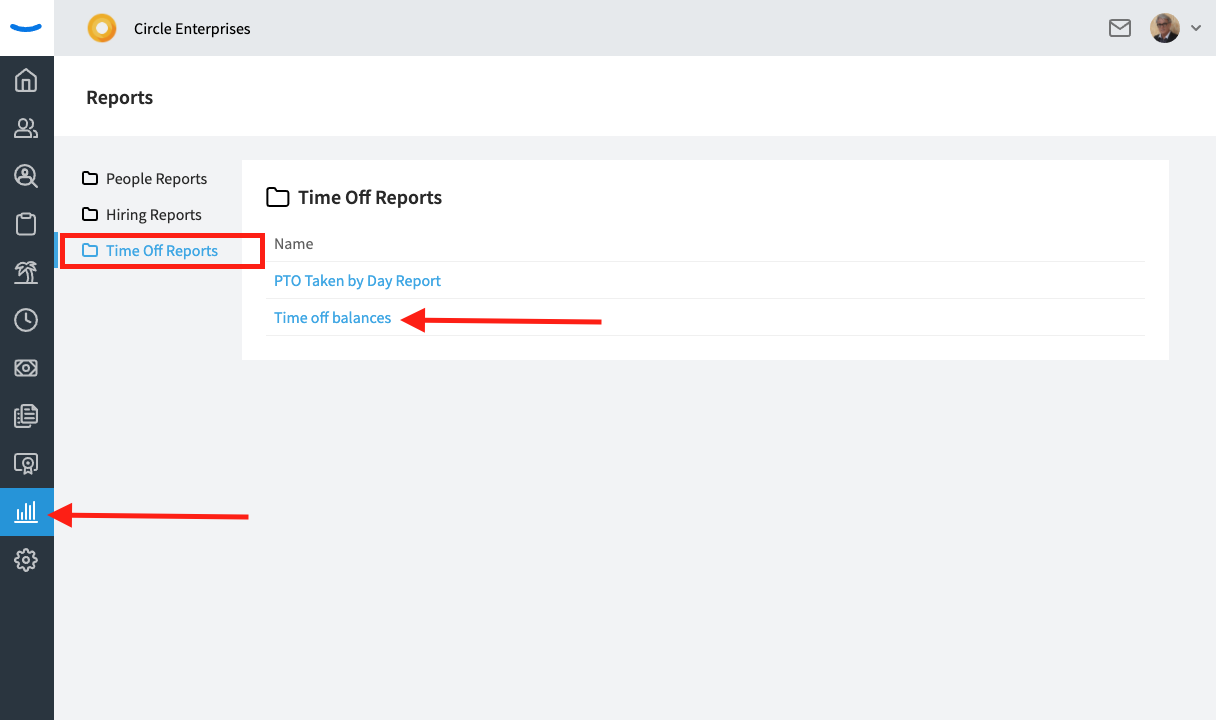
Click into the report to see a detailed view of all employee balances across a period of time.
Balance Report Filters
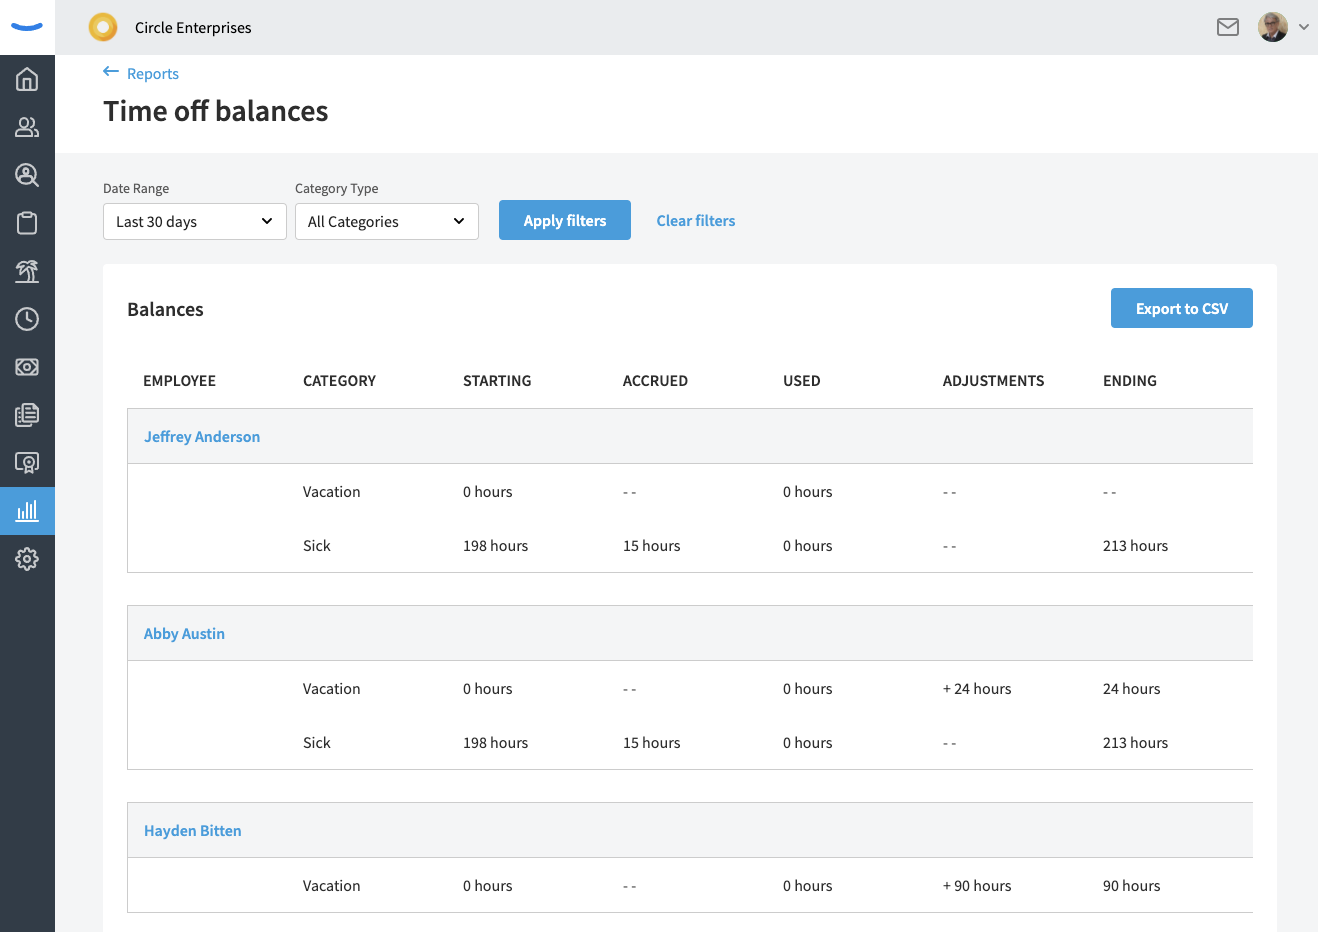
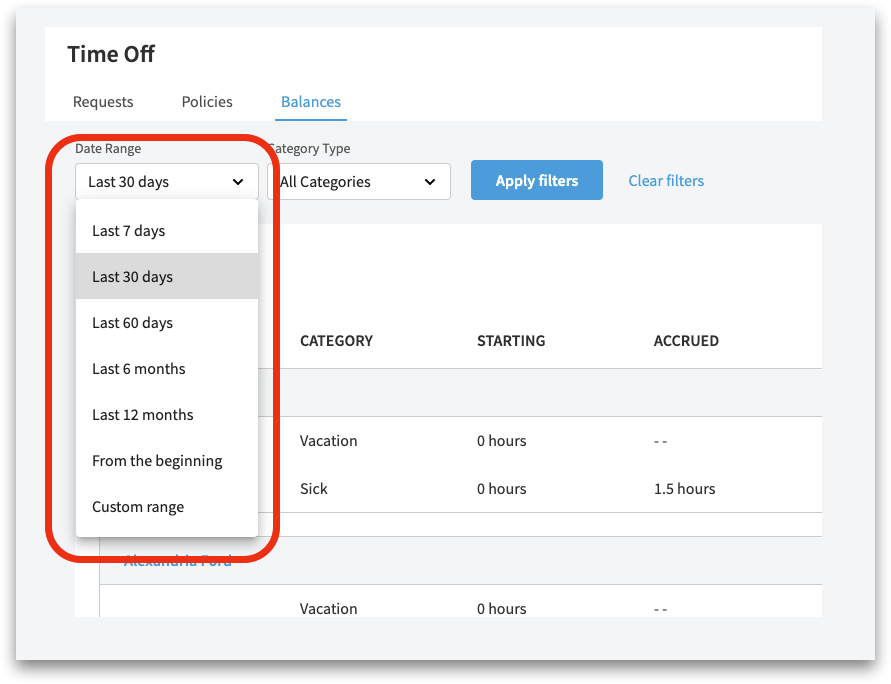
At the top of the Balance Report page, there are a few filters that you can use in order to narrow in on the exact report you’re looking to build. The first filter is the “Date Range” filter. This, by default, is set to the last 30 days. This means that your report will display the starting balance was for each of your employees 30 days ago, the hours the employee accrued or used during the 30 day period, any adjustments made to their balance, and the employee’s ending balance on today’s date.
You can modify the date range to display any amount of time from the last seven days to the last year, or you can choose to pick a custom range of dates.
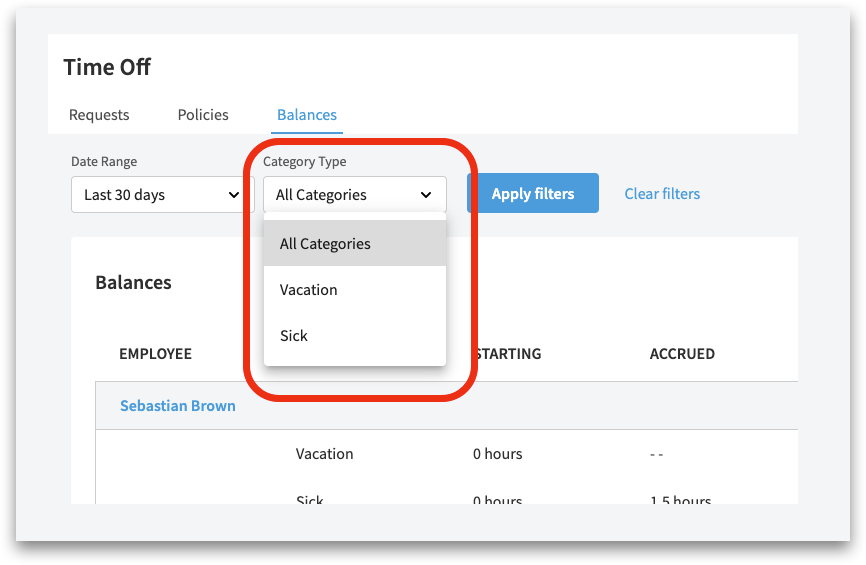
The second filter available to you is the “Category type” filter. By default, this filter is set to “All Categories.” This default setting will display to you the balance of all categories for each of your employees. If an employee only belongs to a single category, the other category will not be displayed.
This filter can be changed to just show a single category by clicking into the dropdown and selecting the desired category.
Once you have your Date Range and Category Type filters set, simply click the blue “Apply Filters” button located to the right of the filter options, and the Balance Report will change to display the information that fits within the parameters of your custom filters.
Exporting a Report to .CSV
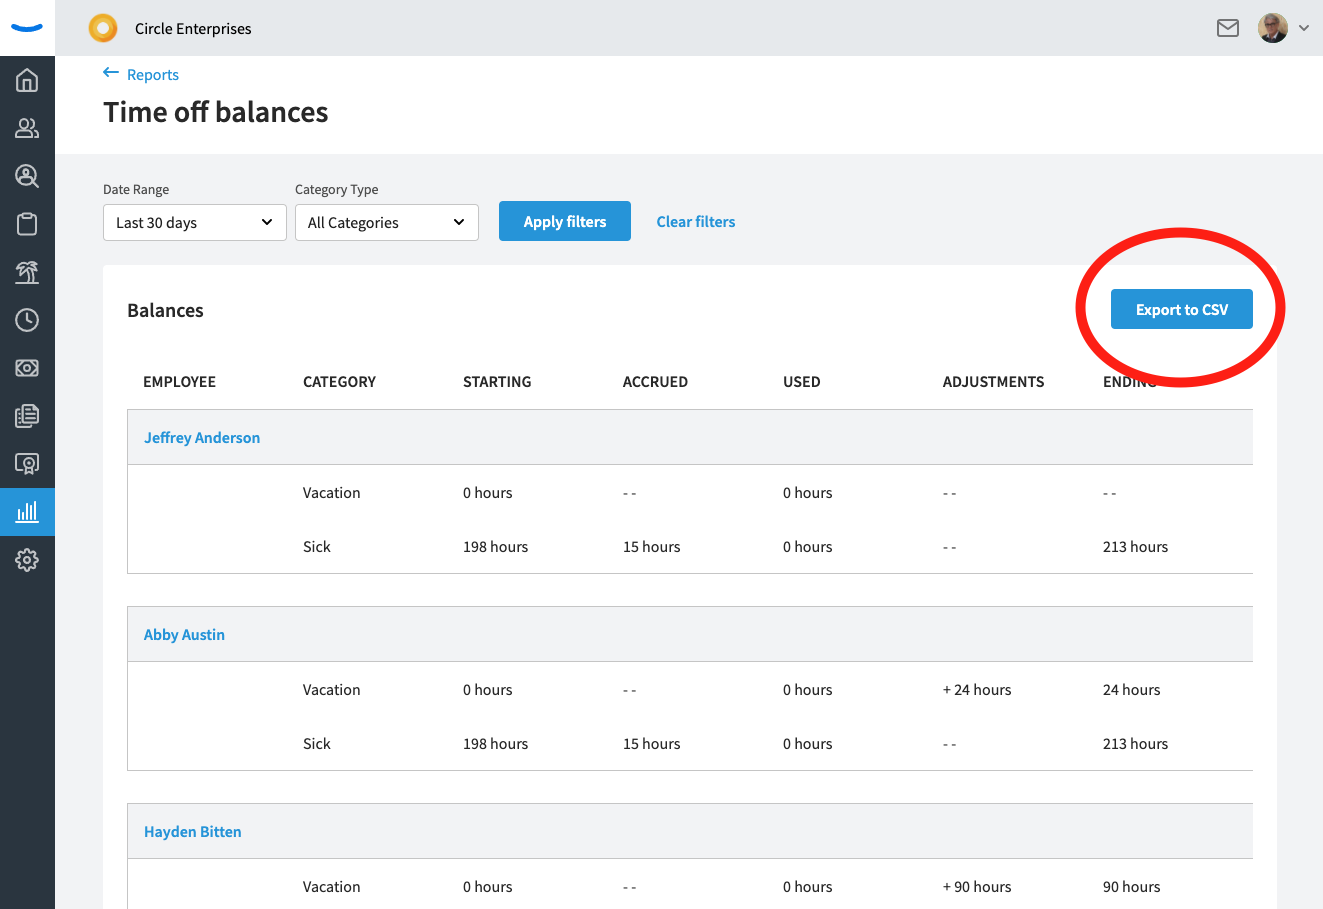
The Balance Report provides an easy export to .CSV if you wish to download the report and share it with others within your company. In order to export your Balance Report, we first recommend that your filters are set correctly. The report you export will match the information on your screen, so be sure you’ve got the correct date range and category information.
The next step is to click the “Export to CSV” button located at the top right of the report.
Once you’ve clicked the button, you’ll be asked to confirm the date range and category filter for your report before you export it. If everything looks good, go ahead and click the “Export report” button, and it will begin downloading immediately.
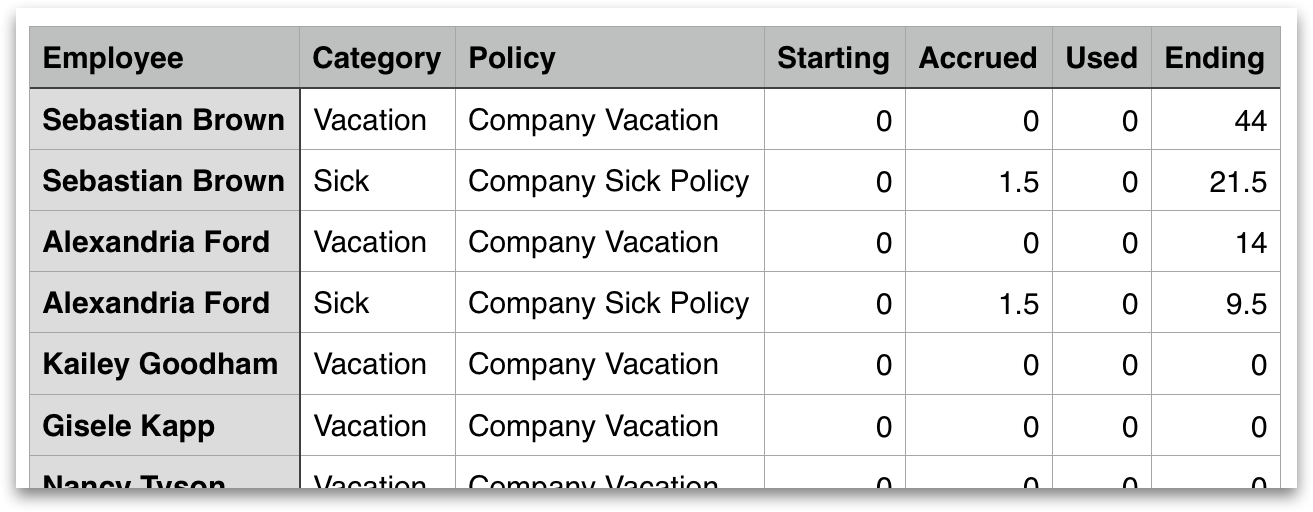
You’ll be able to open your report with Microsoft Excel, Google Sheets, Apple Numbers, or a comparable program. The exported report will display the same information you see in the Balance Report within Eddy.
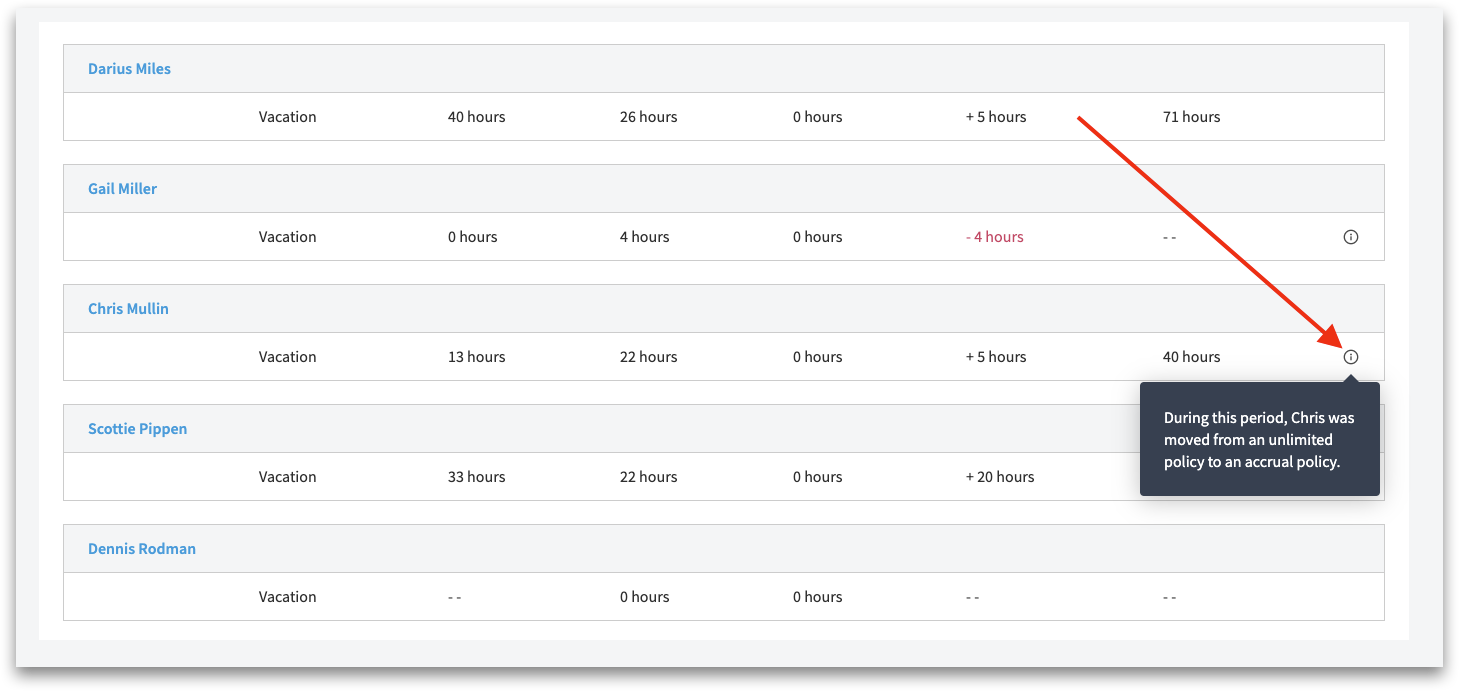
The Information Icon Next to an Employee’s Balance
At some point in time, you may notice that there are employees on the balance report who have an “Information icon” located to the right of their Ending Balance. This icon is an indicator that an action took place during your selected date range that likely made a significant change to the employee’s balance or how this particular employee will accrue time off.
The four reasons you’ll see the Information icon are listed below:
- The employee was moved from a limited accrual policy to an unlimited policy.
- The employee was moved from an unlimited policy to a limited accrual policy.
- The employee was removed from a policy.
- The employee was on a policy that has since been deleted.
When you see the Information icon on your balance report, hover over it with your cursor to see a tool tip explaining what happened to that particular employee.