![cdccd4037784792b954880028bbf7390a34ca91e-2.png]](https://support.eddy.com/hs-fs/hubfs/cdccd4037784792b954880028bbf7390a34ca91e-2.png?height=40&name=cdccd4037784792b954880028bbf7390a34ca91e-2.png)
Prefer to watch? Check out the video walkthrough below, then follow the steps in this article as a reference.
Running payroll in Eddy takes just a few steps. The process is designed to minimize manual entry — hours and PTO import automatically, deductions populate from your existing plan setup, and you can review everything before anything is submitted.
Step 1: Approve Hours
- Go to the Pay tab and select Payroll.
- You'll see a list of your current pay periods. When a period closes, a prompt to approve hours will appear — click it to get started.
- Review your team's timesheets: who worked, how many hours, and which sheets are still pending.
- Click into any timesheet to review the details, then approve hours when everything looks correct.
Step 2: Open the Payroll and Review Earnings
Once hours are approved, open the payroll to begin the review process.
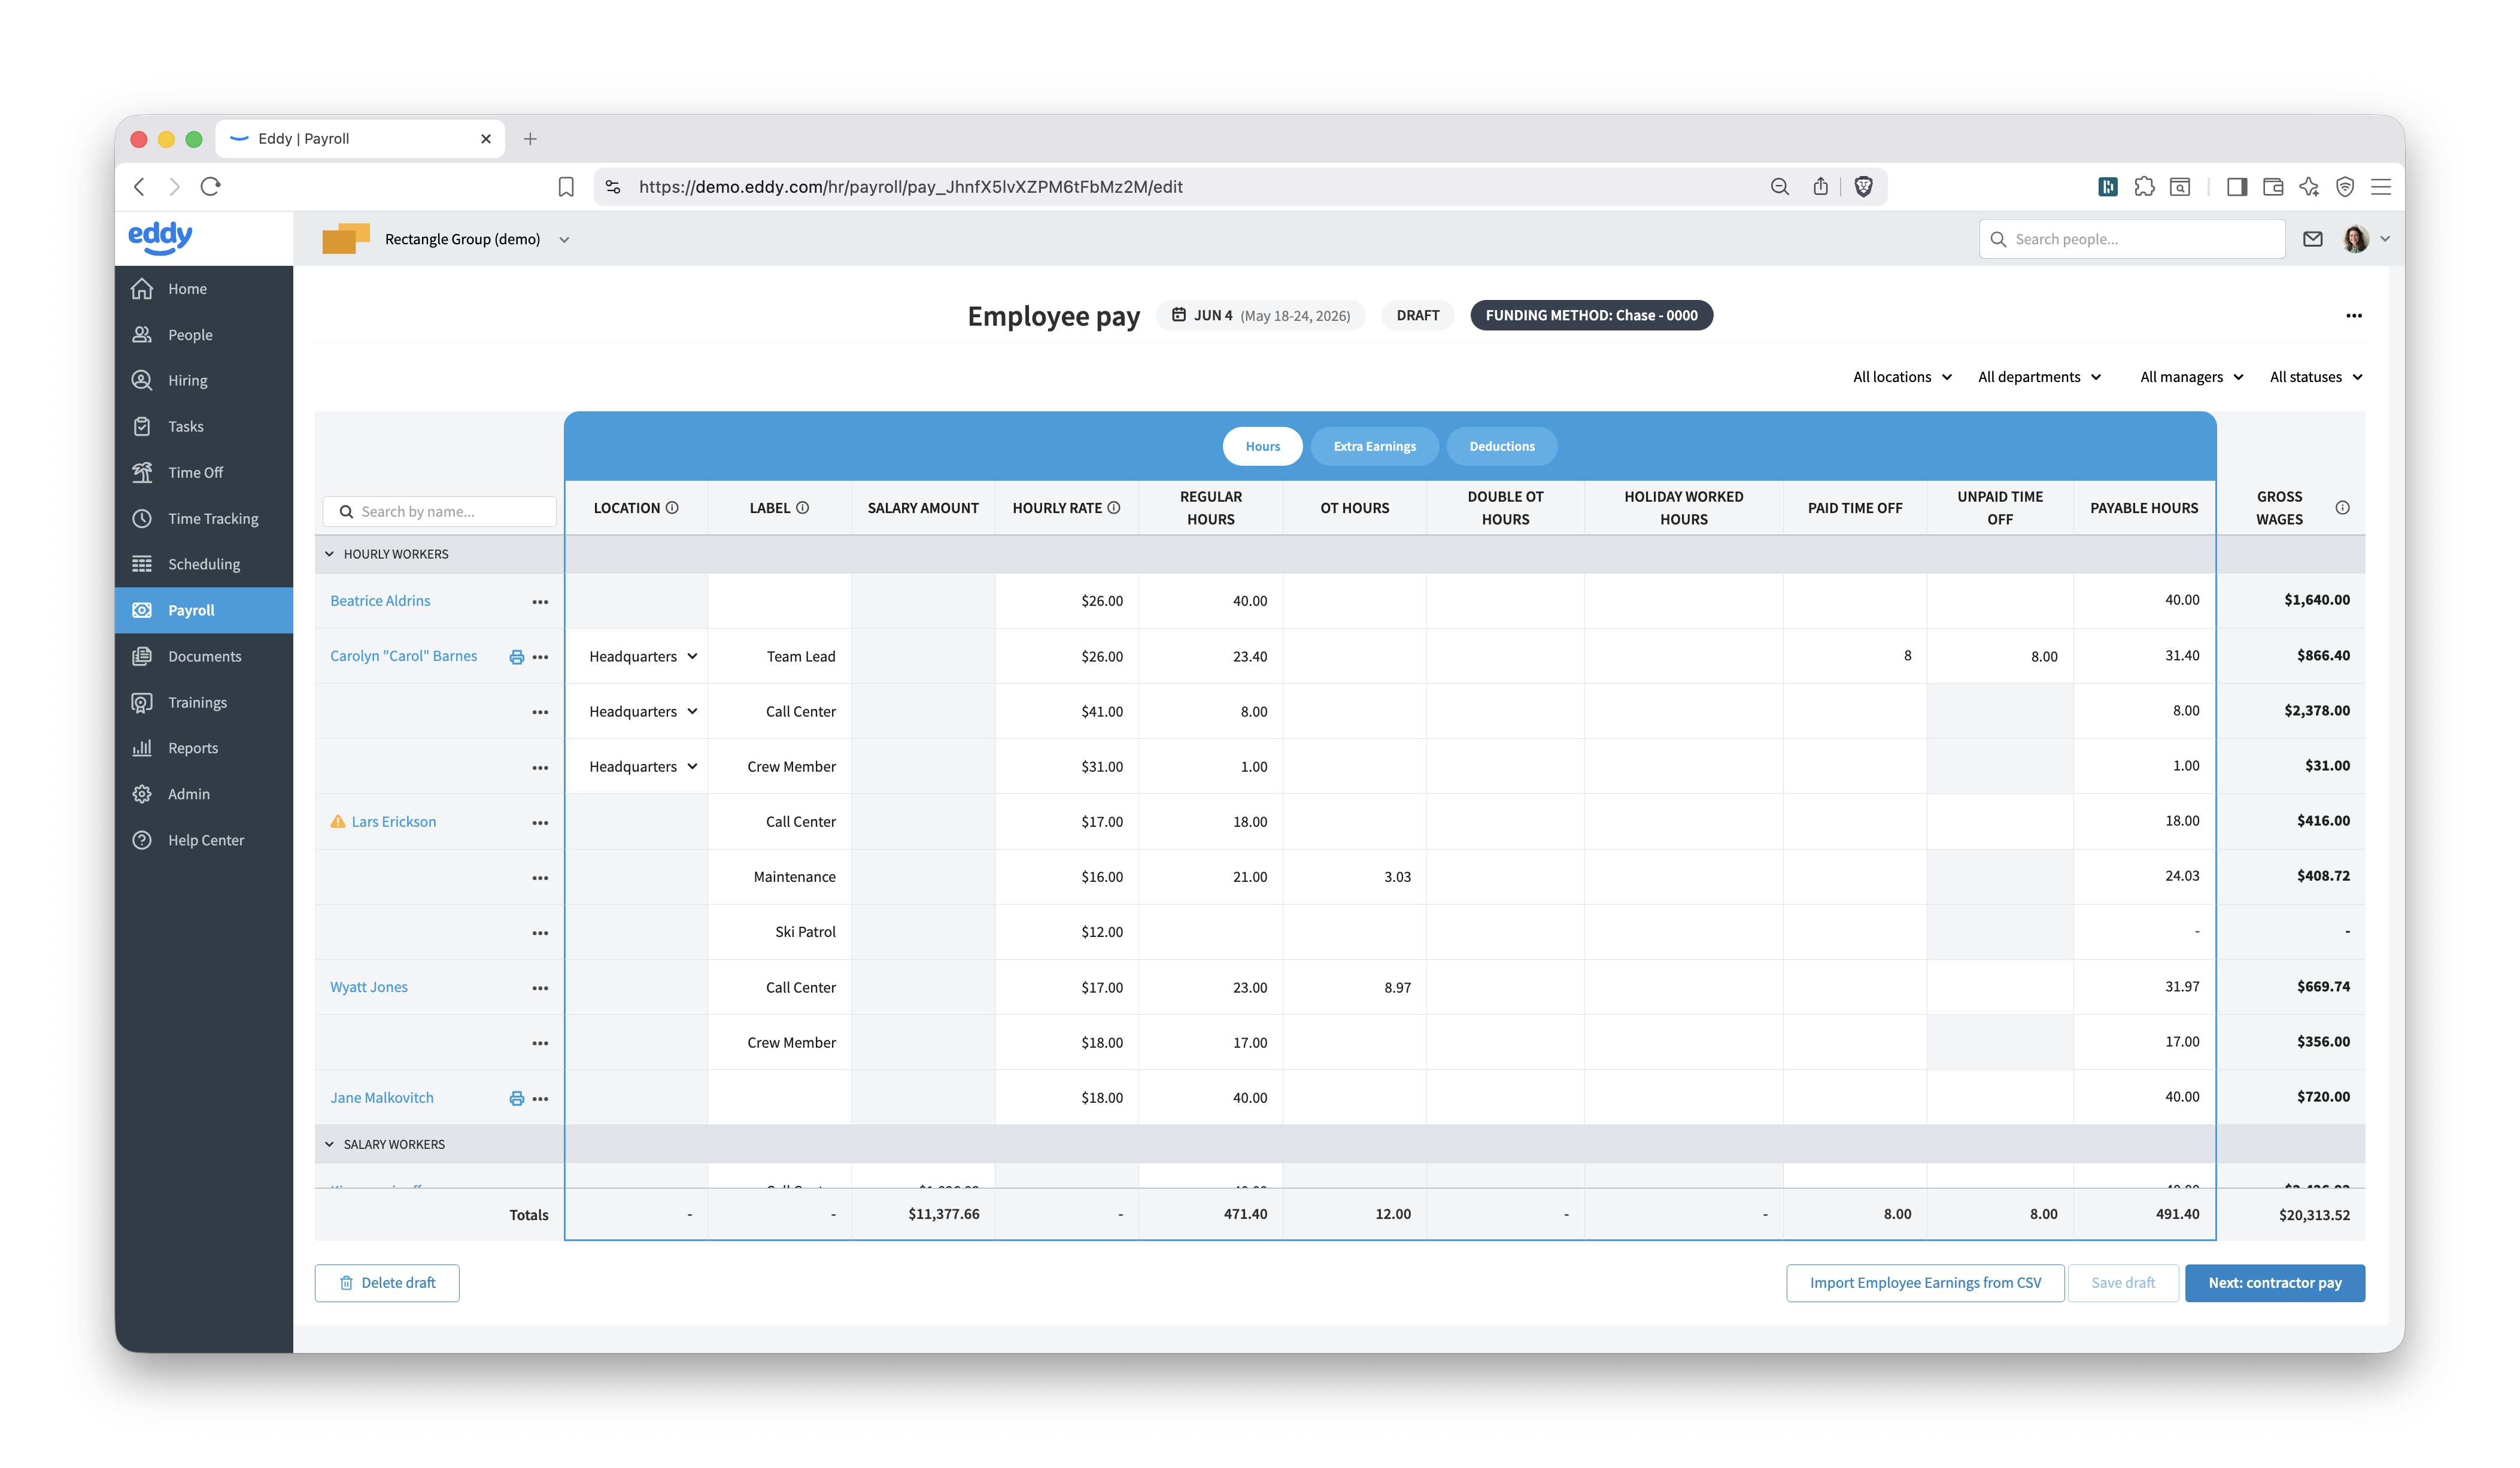
On the Earnings tab:
- Any employees who haven't completed their setup will be flagged. You can exclude them from this pay run or navigate to their profile to finish setup before proceeding.
- Hours worked and recorded PTO are imported automatically. Hourly employees will show hours pulled from their timesheets; salaried employees will have standard hours pre-filled.
- If any hours are missing, you can type them in manually.
- Review gross wages and make any adjustments directly on this screen before moving on.
Step 3: Add Extra Earnings (If Needed)
The Extra Earnings tab is where you'll add anything beyond regular pay:
- Bonuses, commissions, or severance
- Reimbursements for out-of-pocket employee expenses (these are non-taxable)
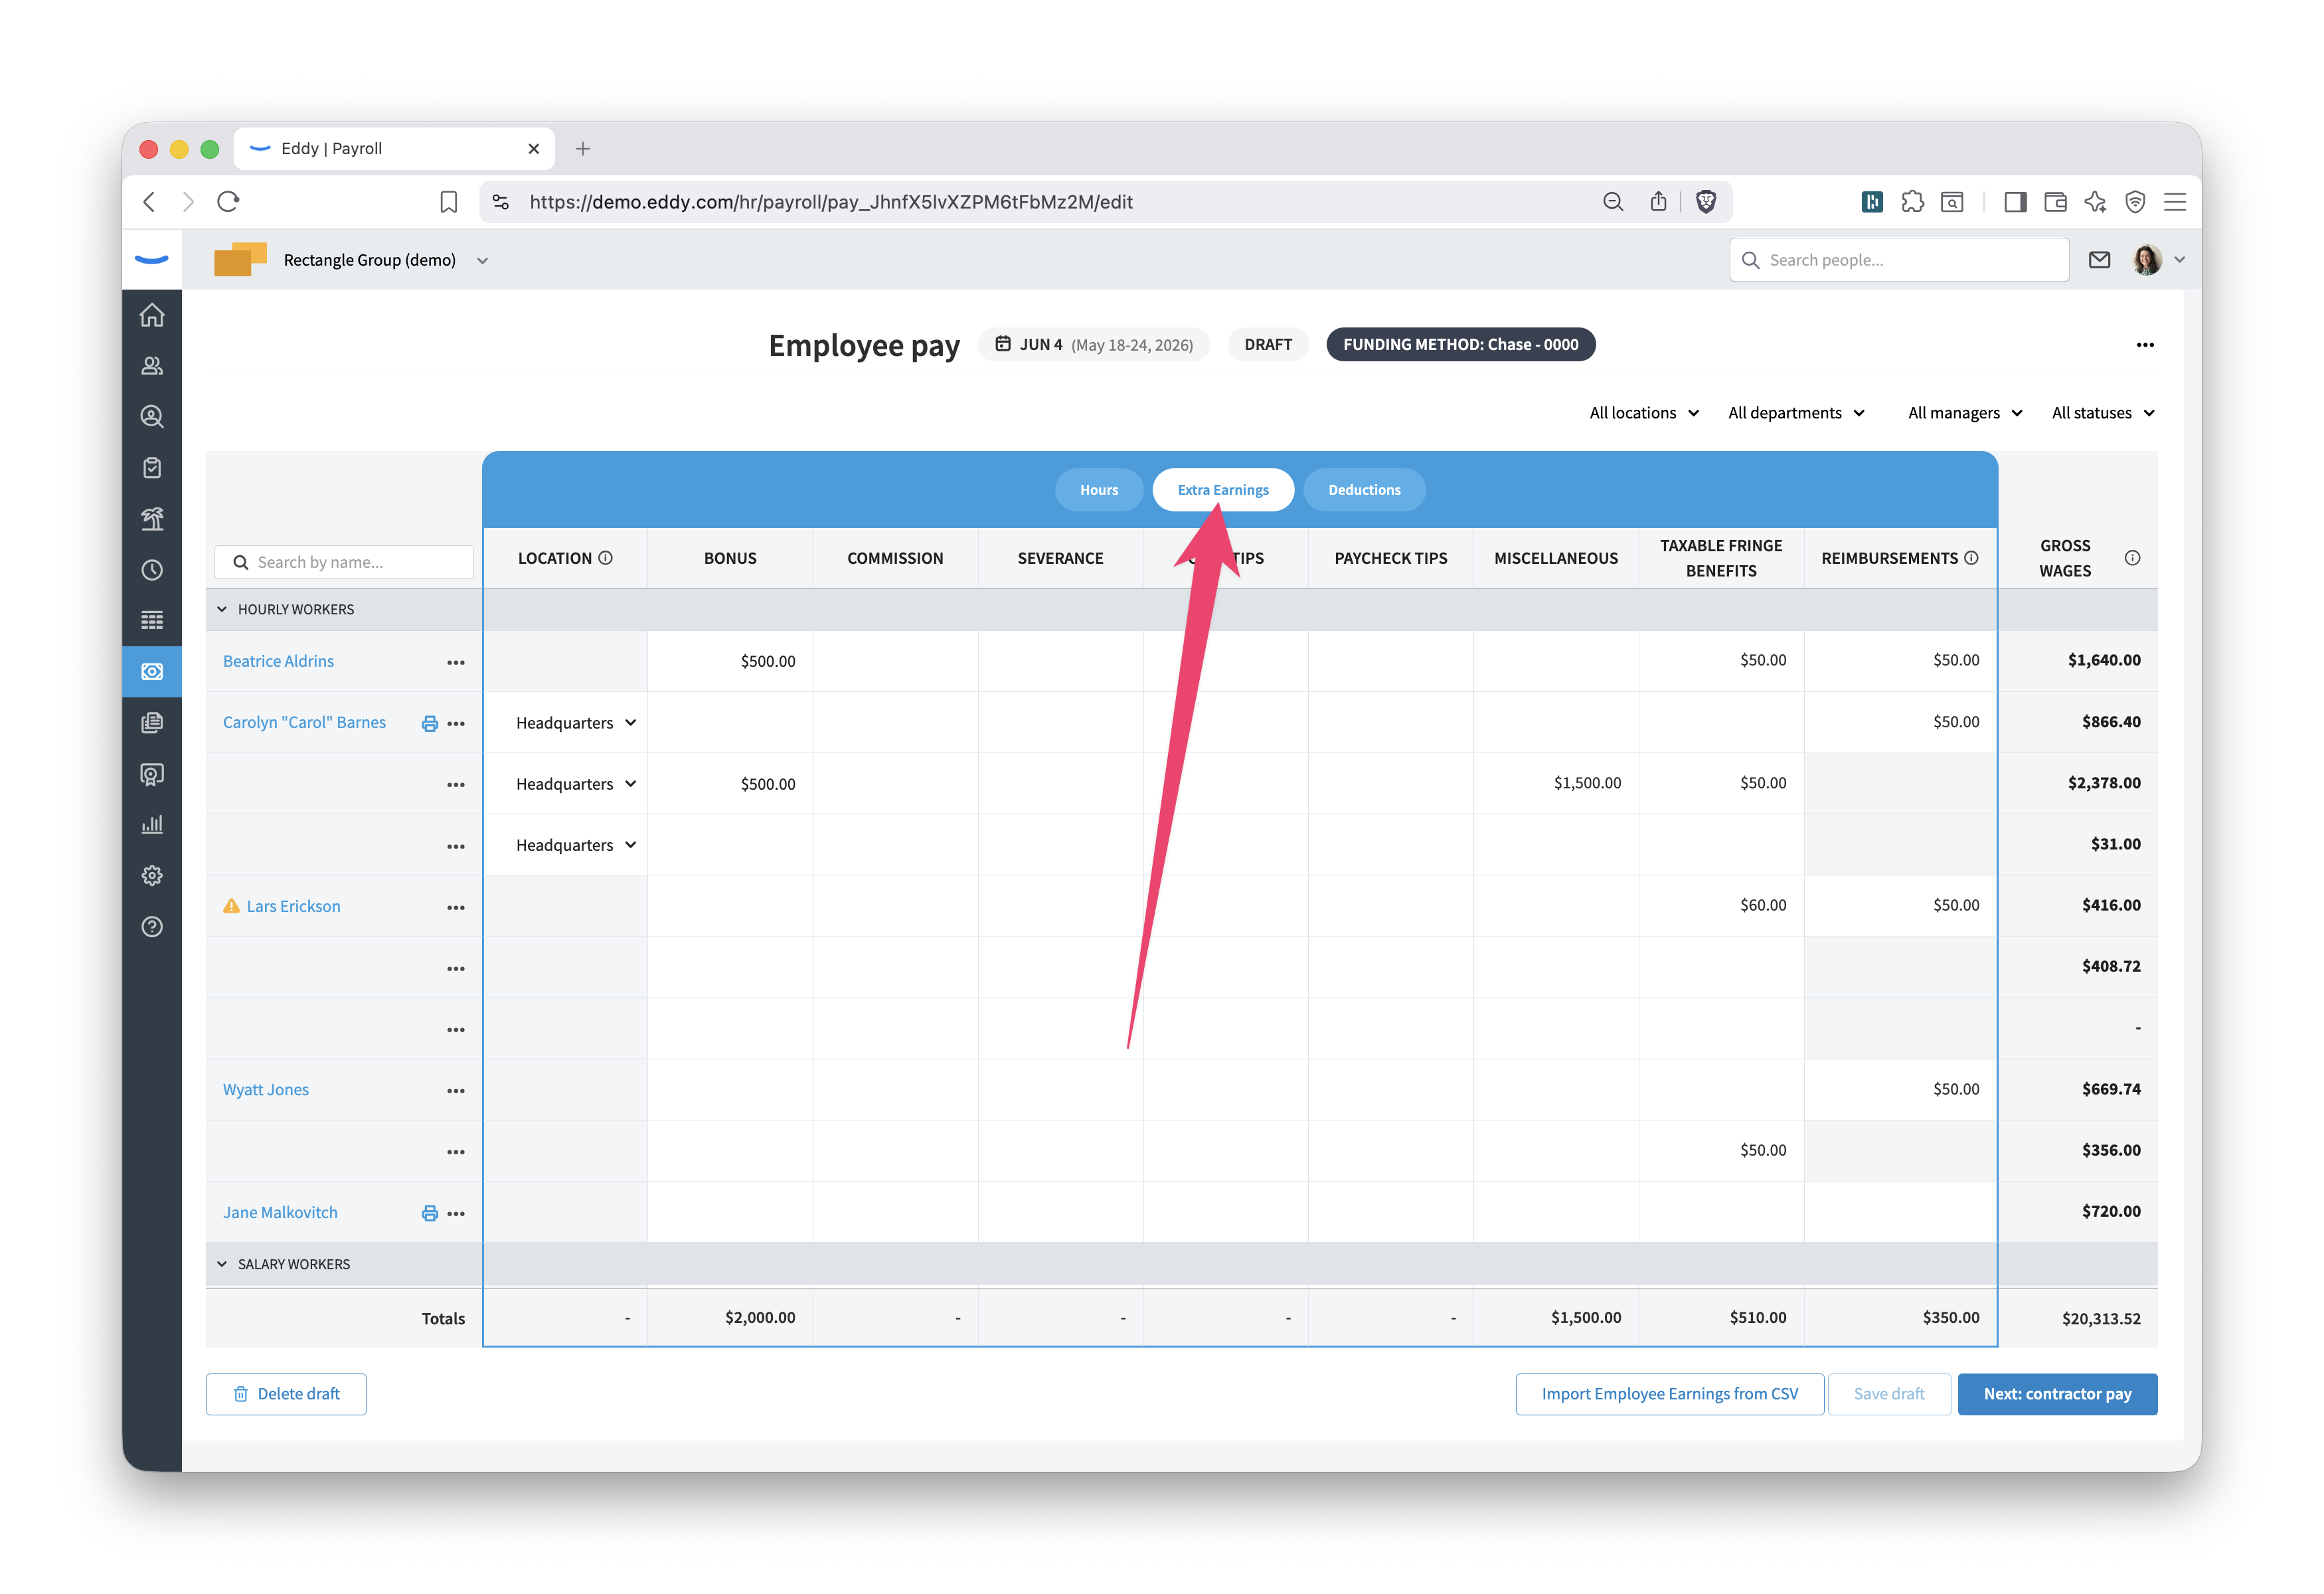
You can add multiple line items — for example, separate entries for different expense types or per diems.
If you have nothing to add here, you can skip this tab.
Step 4: Review Deductions
On the Deductions tab, all deductions configured in Eddy will populate automatically — including medical, dental, vision, retirement contributions, child support, and wage garnishments.
For most pay runs, this is a quick review. No manual entry is required unless something has changed.
Step 5: Add Contractor Earnings (If Applicable)
If you have contractors, navigate to the Contractors tab and enter any earnings for this pay period before moving on.
Step 6: Preview and Submit
When you're ready, go to the Payroll Preview page. Here you'll see:
- Total debit amount for this payroll
- Submission deadline
- A summary card for each employee and contractor, including tax withholding details
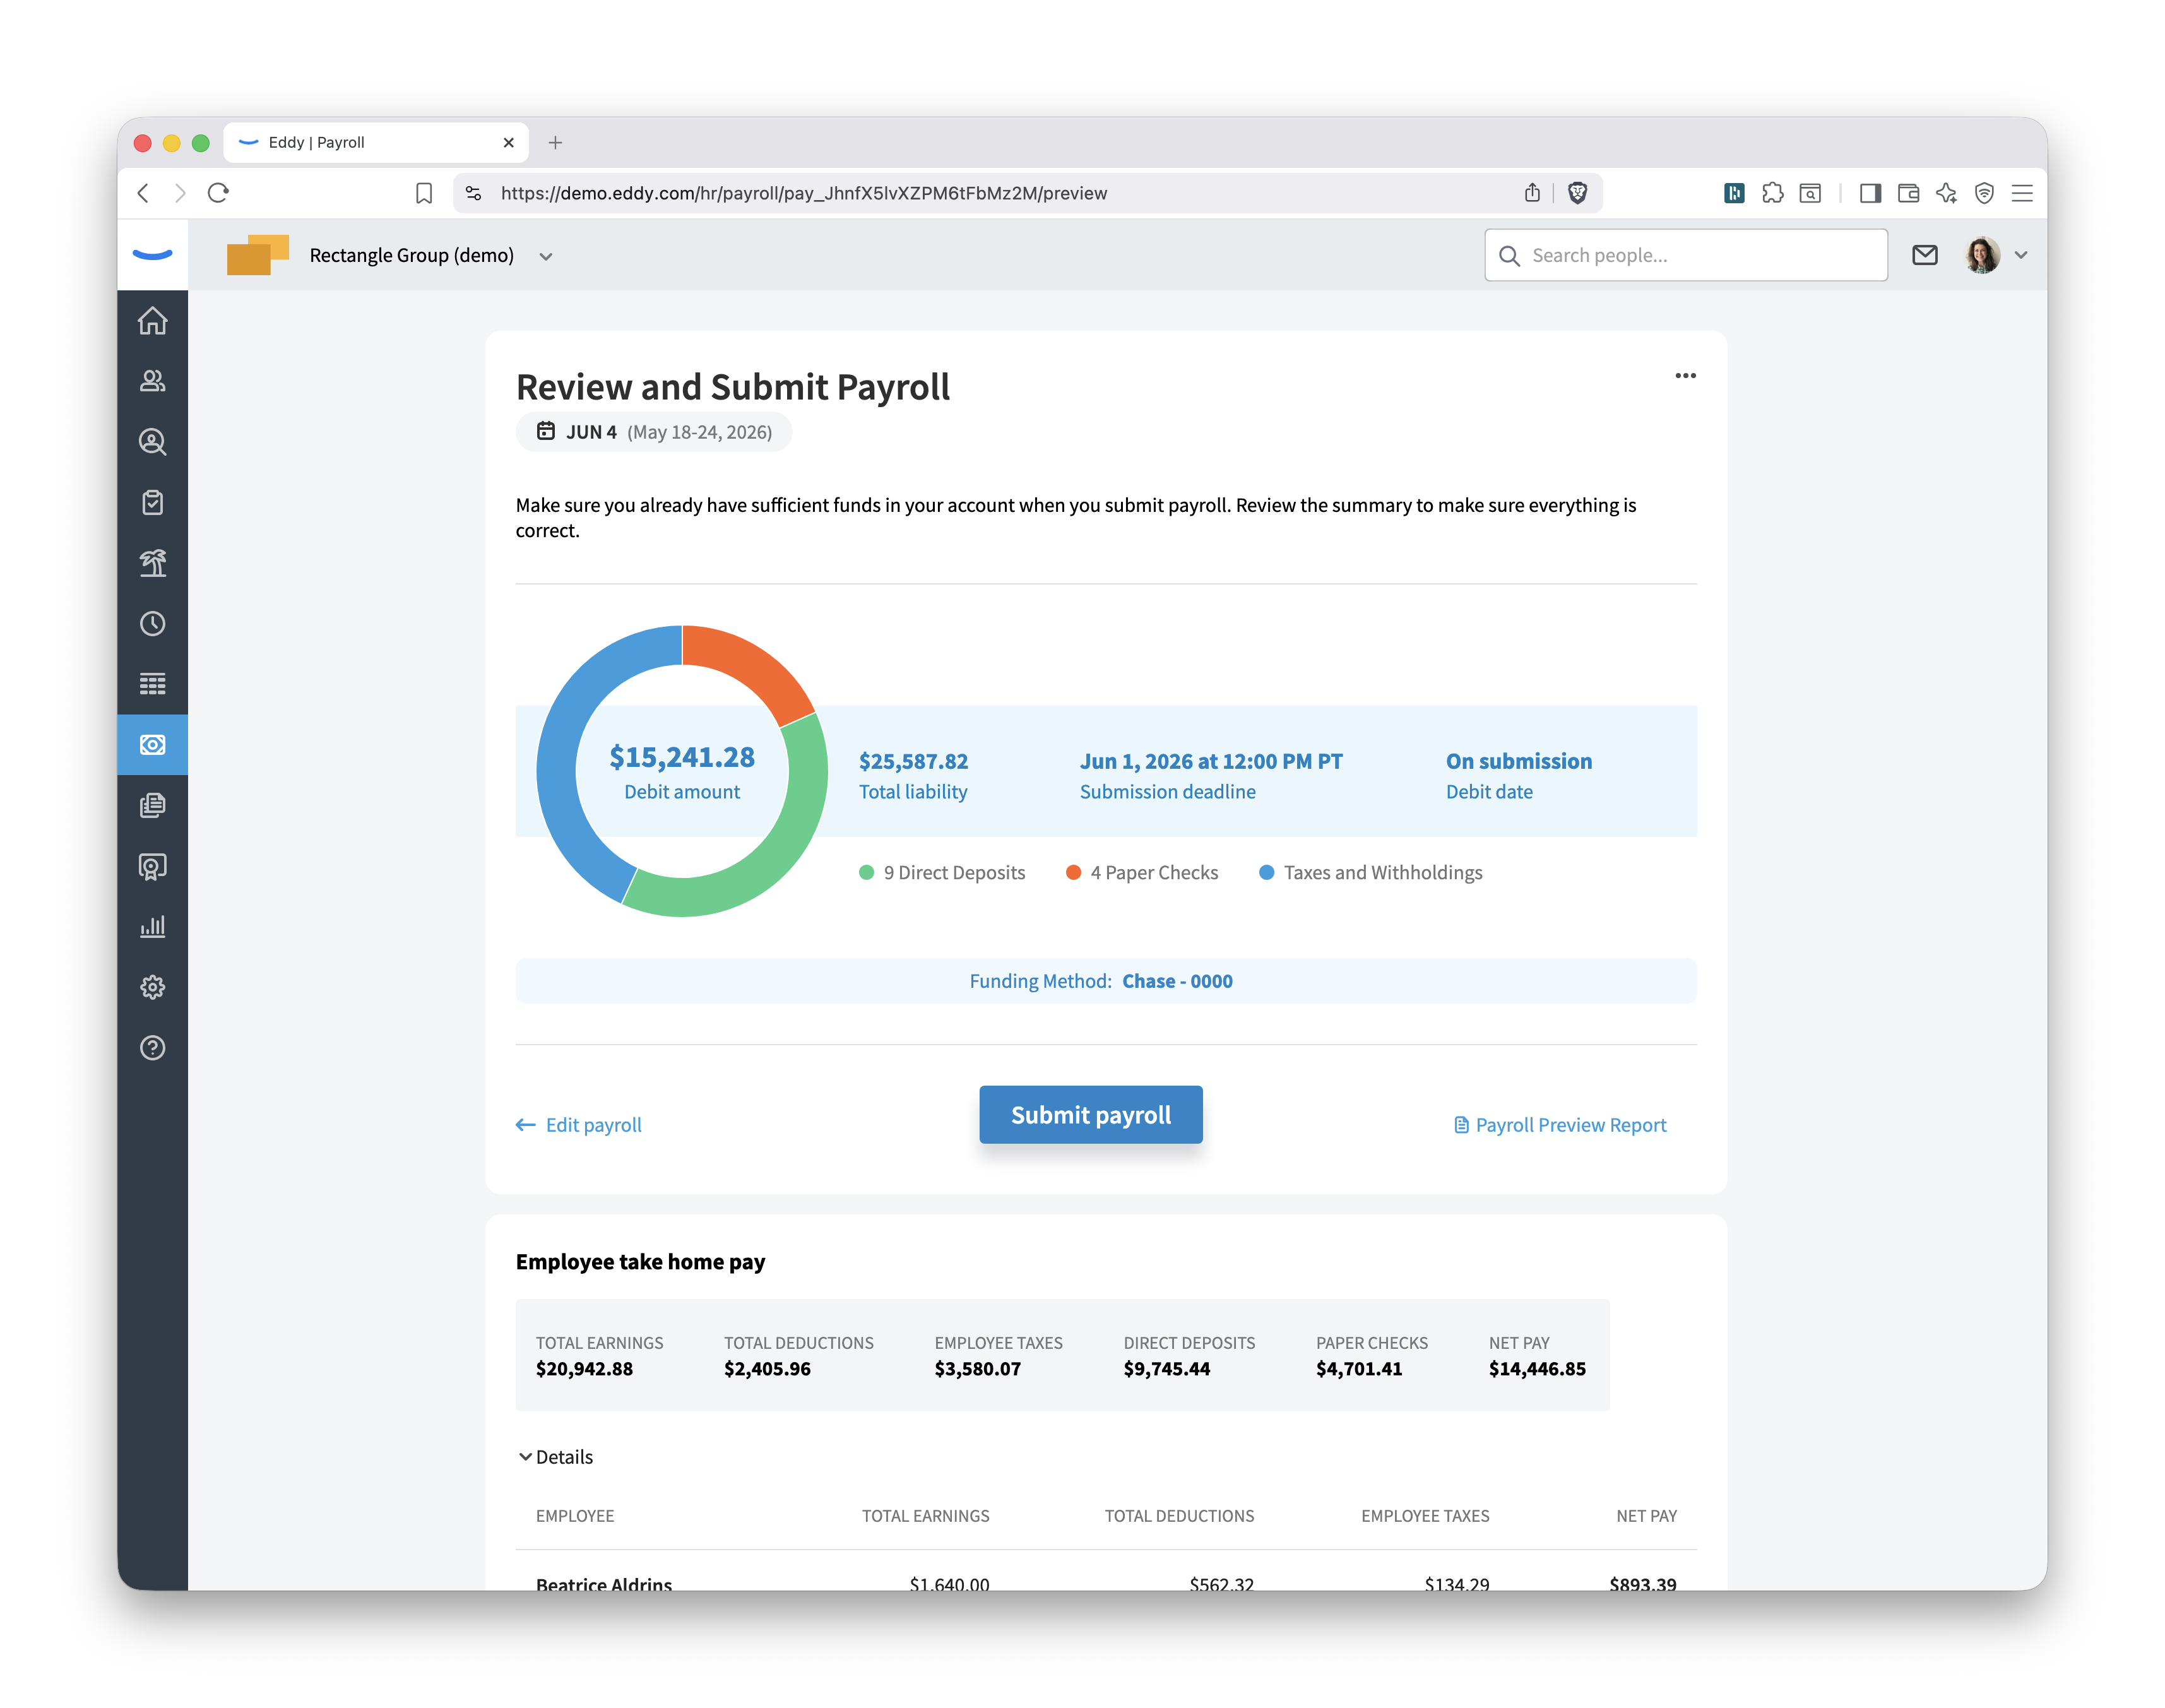
Want a full breakdown before submitting? Click Payroll Preview Report to open the payroll journal. This report shows every earning type, pay stub detail, and tax withholding for each worker.
If anything needs adjusting, click Edit Payroll to go back and make changes.
Once everything looks right, click Submit Payroll.