How to set up Workers' Compensation Codes in Eddy
At Eddy, we want to ensure that all of your data is in one place. This includes Workers' Compensation Codes. This information is important to have on file particularly for payroll purposes. It will help classify your employees correctly.
Getting started
To set up worker' compensation in Eddy, you will need to have admin-level access
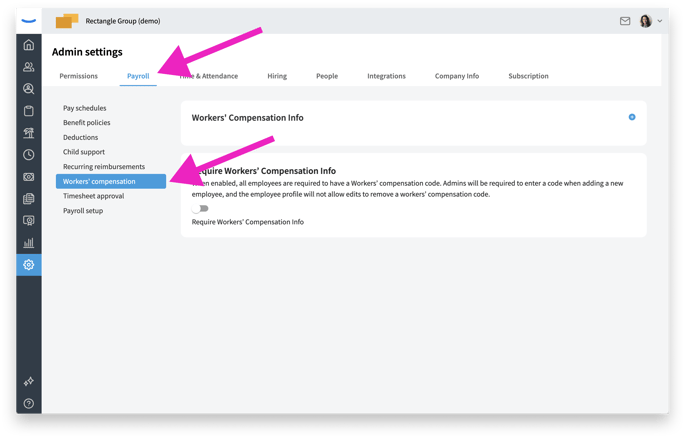
To add workers' compensation info, navigate in Eddy to the Admin settings page and click the Payroll tab. Under the menu options on the left-hand side, click the Workers' compensation button.
How Workers' compensation codes work in Eddy
Workers' compensation codes in Eddy are created and defined at the company level. Individual employees are then assigned to one of these codes on their employee profile page or when they are first added as a new employee.
How to add a workers' comp code
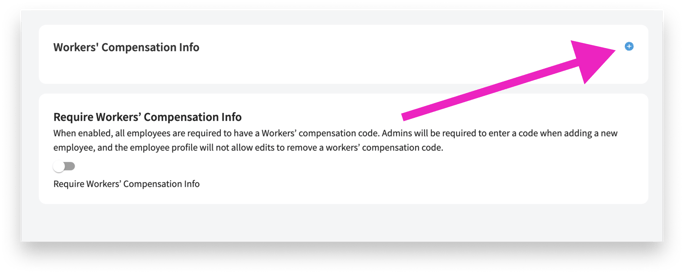
To add a workers' compensation code, click the add icon in the Workers' Compensation Info card.
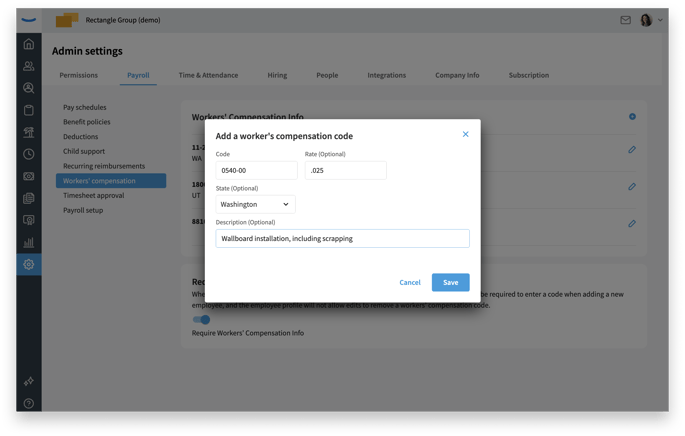
You'll then see a form to add the code, the rate, select the state, and add a description. The description will typically be the name of the code.
Require Workers' compensation info
If your company is required to have worker's comp info for each employee, you can enable this option in Eddy to require all employees to have a Workers’ compensation code. Admins will be required to enter a code when adding a new employee, and the employee profile will not allow edits to remove a workers’ compensation code.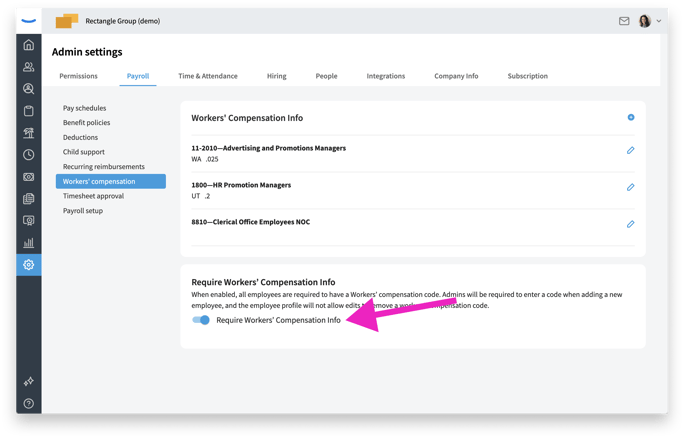
How to connect an employee to a worker's comp code
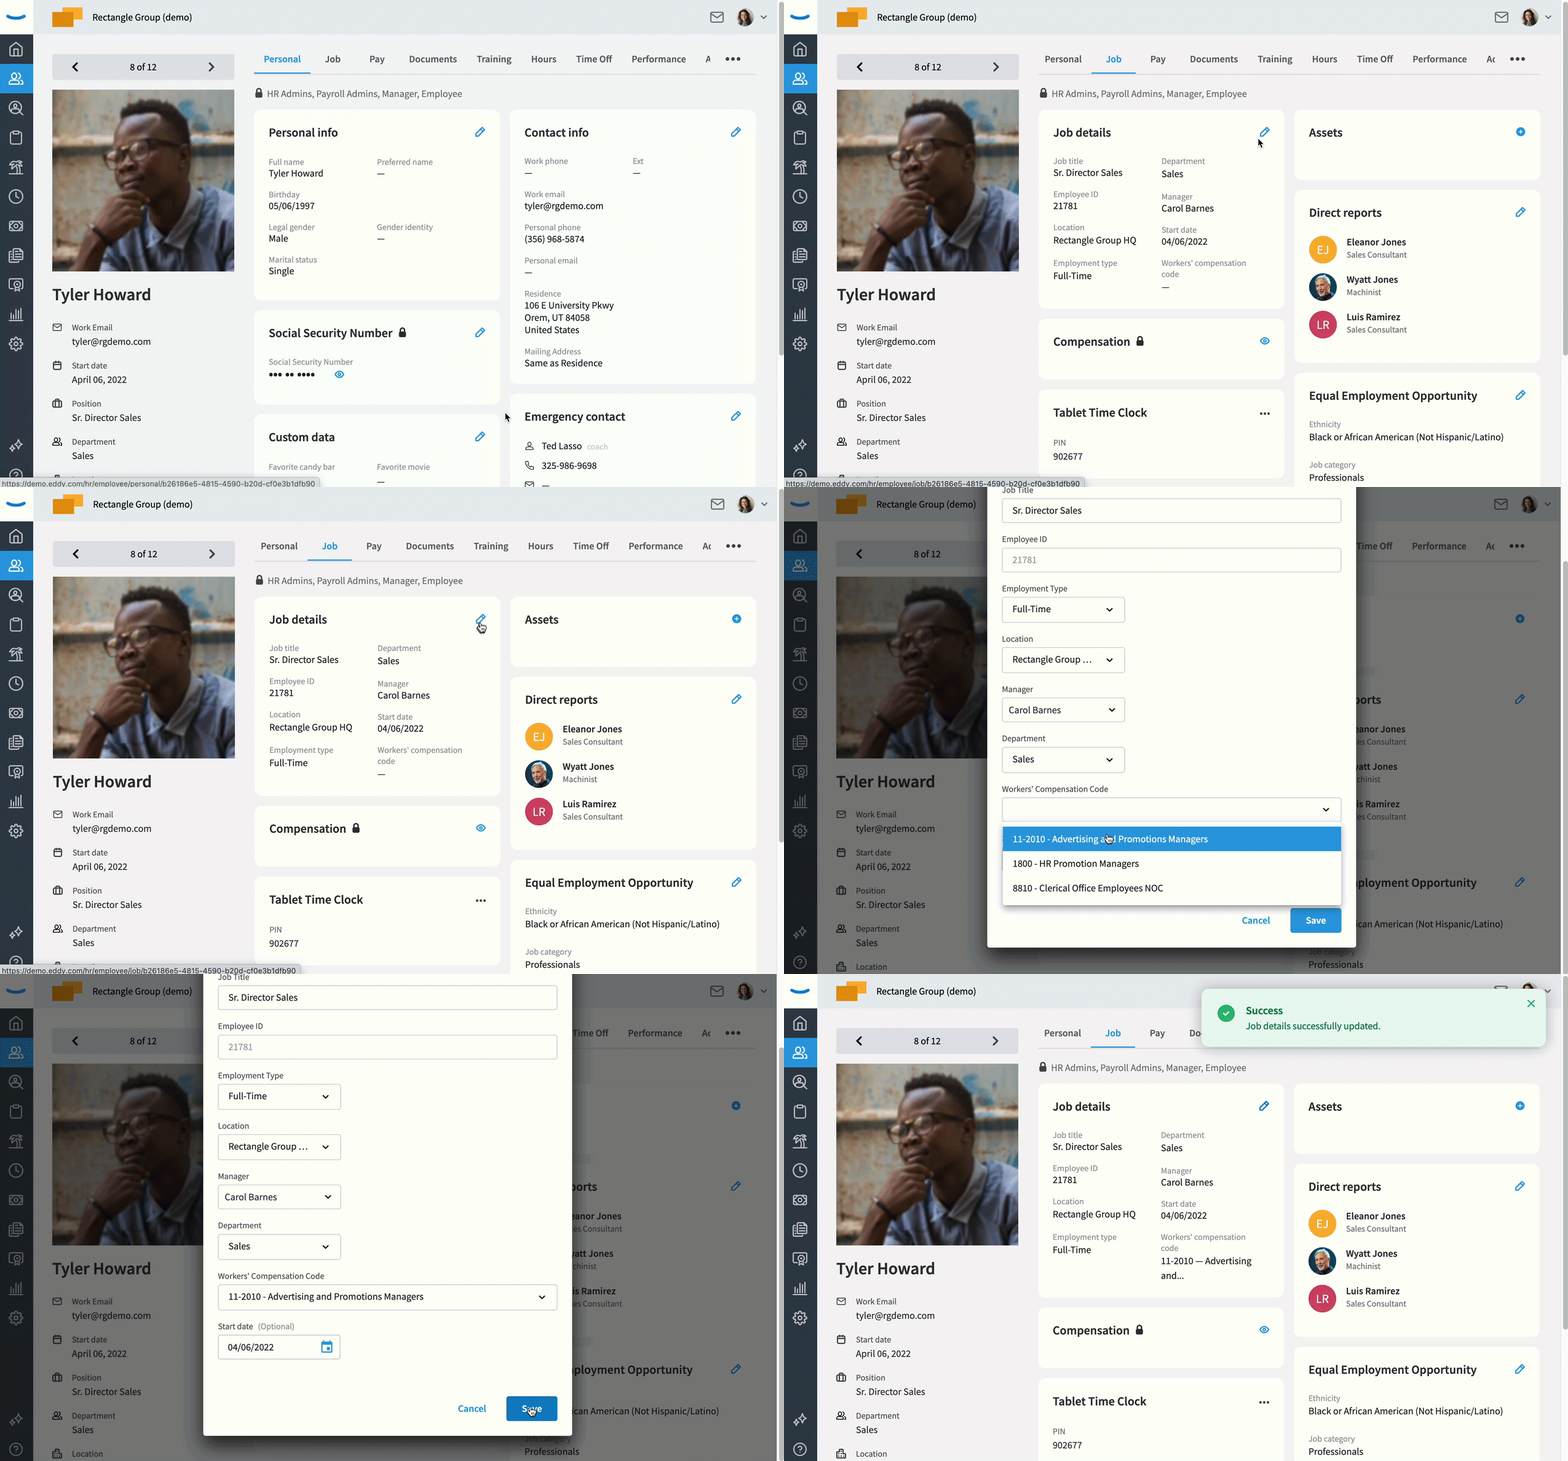
Adding or editing a worker's comp code for an individual employee is done from the person's employee profile. Click on the job tab. The workers' comp info is shown on the job details card. To add or edit this, click the edit icon to open the edit card.
