Getting Started
From the main navigation, click Scheduling. You should now see a grid with dates across the top and workers listed along the left side for that location.

Add a Shift for One Worker
-
Find the worker’s row and the day you want to schedule.
-
Click in the empty cell to create a new shift.
-
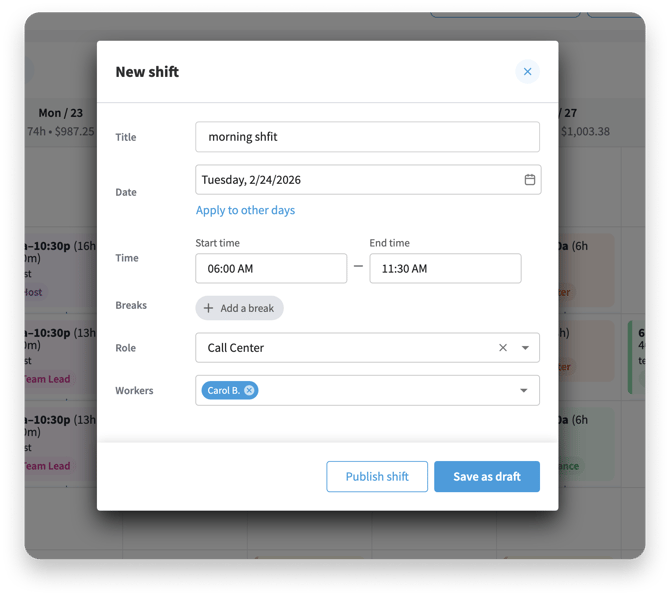
In the Add shift panel or modal, set:
-
Start time and End time.
-
Position/Role (if needed).
-
Location (if different from the default).
-
-
(Optional) Add a title for the shift, such as “Opening shift” or “Covering front desk.”
Keep your first shift simple so you can verify it appears correctly on the grid.
Including Meal and Rest Breaks
If your organization uses breaks, you can add them directly to the shift.
-
In the Add shift modal, look for an Add break or Breaks section.
-
Click Add break.
-
Choose the Break type (for example, Meal or Rest).
-
Set the length of the break (for example, 30 minutes).
-
Indicate whether the break is paid or unpaid, according to your policies.
-
(Optional) Set a break start time if you want the break to happen at a specific time in the shift.
Breaks help keep scheduled hours accurate and support compliance with your time and attendance rules.
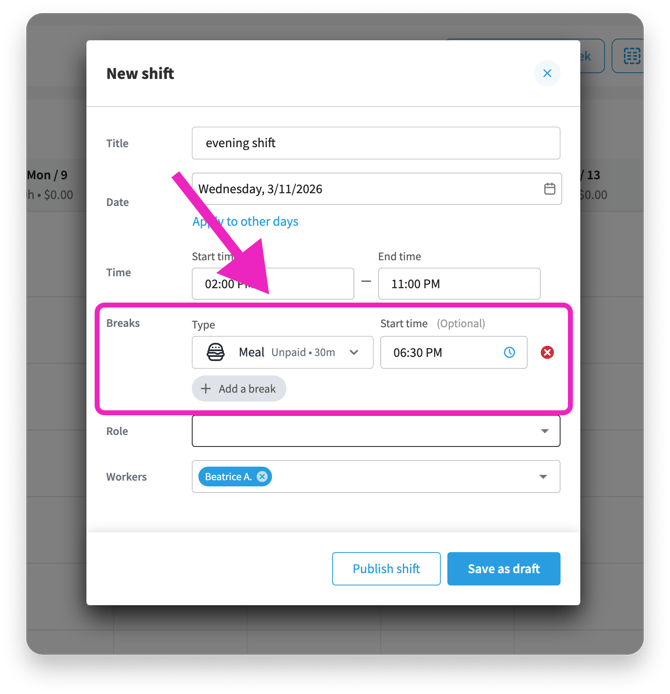
Add meal and rest breaks directly to the shift so scheduled hours match your policies.
Extend Shifts to Other Days
A shift can be applied to multiple days by clicking the Apply to other days link. This makes is easy to create a workweek schedule in bulk.
 Select the days you want to shift to apply to. When you save the shift it will appear on each day selected.
 Assign Shifts to Multiple Workers
A shift can be applied for multiple workers. Repeat the process for each worker who needs to be scheduled.
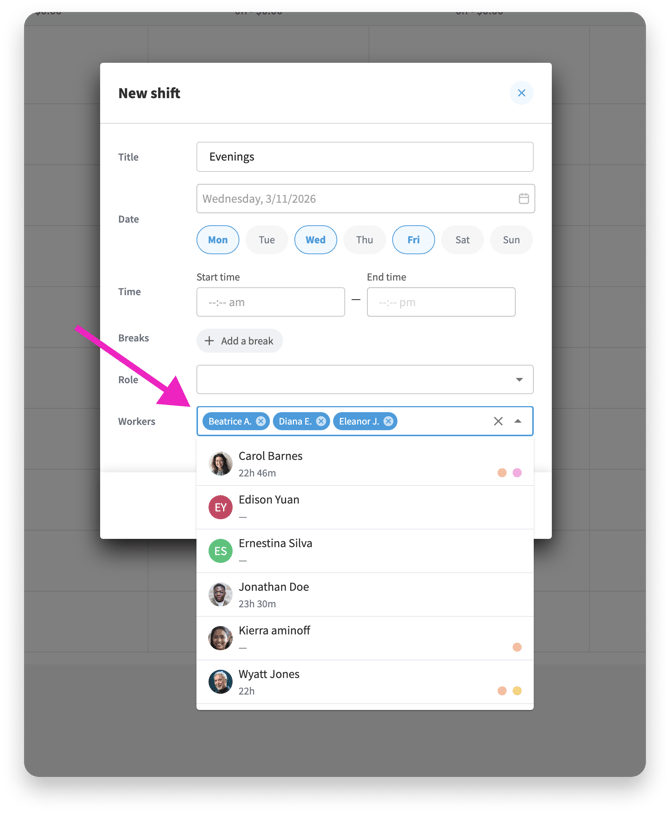
Add shifts for each worker until every required role and time slot is covered.
Review for Conflicts and Coverage
Before you publish, review the schedule for issues. Look for workers who have overlapping or back-to-back shifts without enough rest. Ensure no one is scheduled outside their usual location, if that matters for your business. Also, confirm you have enough people scheduled for your busiest times and critical roles.
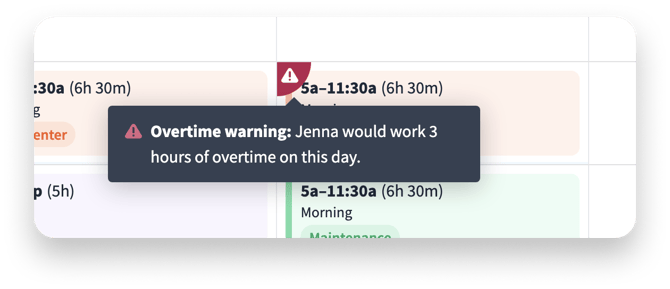
Eddy will show a flag to alert you if a worker's proposed schedule will create a conflict with PTO, unavailability, or would result in overtime.
Unavailability: Ensure no one is scheduled for work that conflicts with their availability schedule.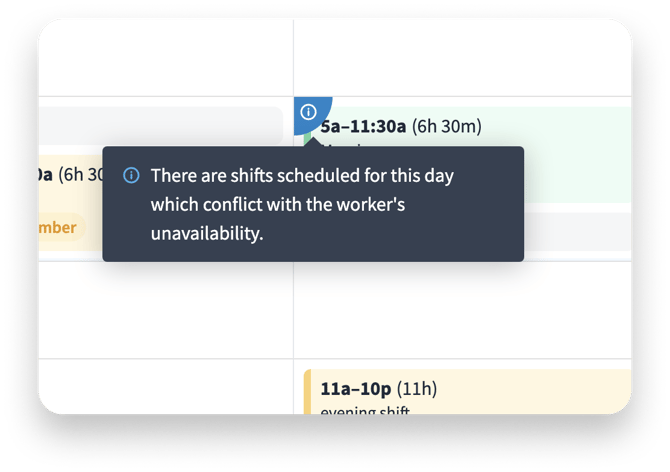
PTO: make sure no one is scheduled to work on a day that they have off.
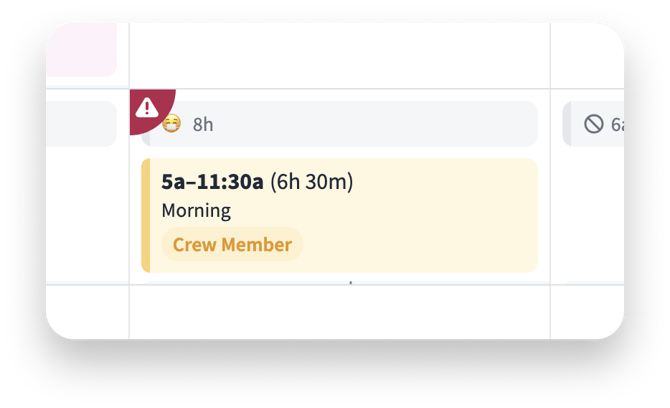
Overtime: Make sure you are OK with any overtime work that is scheduled. Eddy will flag a shift that results in overtime, but will still allow the schedule to be published.
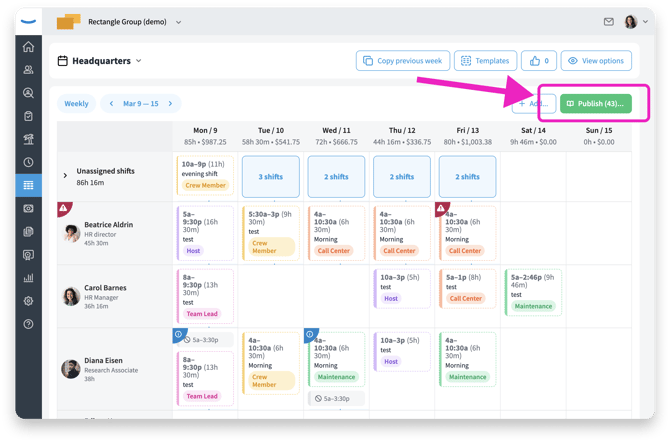
Publish the Schedule
When you’re satisfied with your changes, it’s time to publish the schedule so workers can see their shifts.
-
Click Publish from the schedule view.
-
The date range you will publish is the week you are viewing.
-
Review the summary of shifts that will be published.
- Click Publish to finish.
Once published, employees will see their shifts and they’ll receive a message letting them know the new schedule is available. If they have Eddy's mobile app, they'll get a push notification on their phone.
Publish your schedule and notify employees so everyone knows when they’re working.
Make Edits After Publishing
It’s normal to update the schedule after it’s been published. And thankfully, it is also easy enough to do. Hover on any shift to view the 3-dot menu. Click on the Edit option to open the edit dialog.
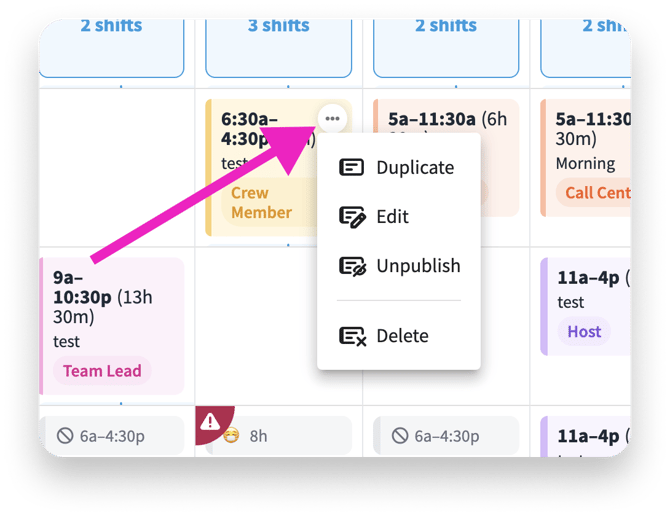
You can edit an existing shift's start/end times, breaks, or role. Then save your changes. Edits to a published shift do not change the shift's published status.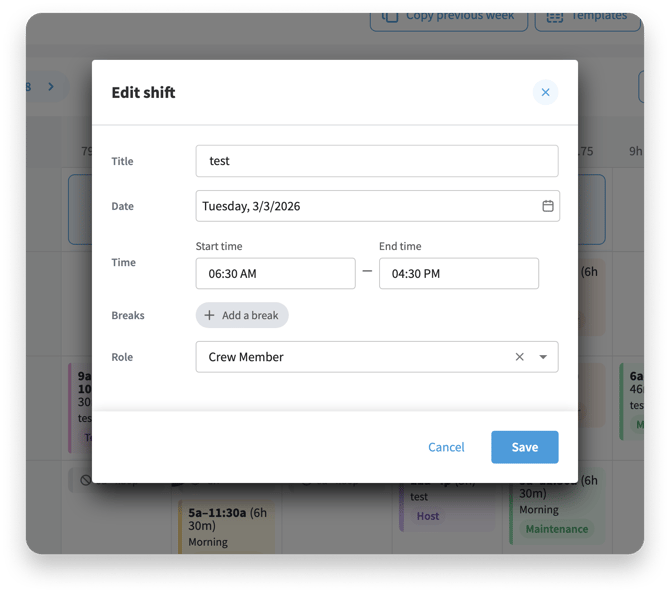
Edit or move shifts as needed—your schedule stays flexible even after it’s published.
Next Steps
After you’ve created your first set of shifts, you can speed up future scheduling and handle changes more smoothly. We recommend reading:
-
Managing Recurring Schedules and Templates – Reuse common patterns so you don’t have to rebuild them each week.
-
Handling Shift Changes, Swaps, and Open Shifts – Let employees help cover changes while keeping control over final approvals.
These articles will help you move from a basic first schedule to a flexible, efficient scheduling process.